Tight Moves & Virtual Roads: A Cadillac Case Study
Cinematographer
Luc Delamare
Lighting
Behind The Scenes
Camera Movement
KEY GRIP
Brendan Riel
Overview
Industry:
Car Industry
Location:
Los Angeles
Grip Package:
Legacy Grip 5 Ton
Shoot Days:
3
the crew
Gaffer:
Vincent Valentin
Best Boy Grip:
Connor Colby
Grips:
Kyle Sorvig, Thorn Shaffer, Matthew Seest, Logan Alesso
The Overview
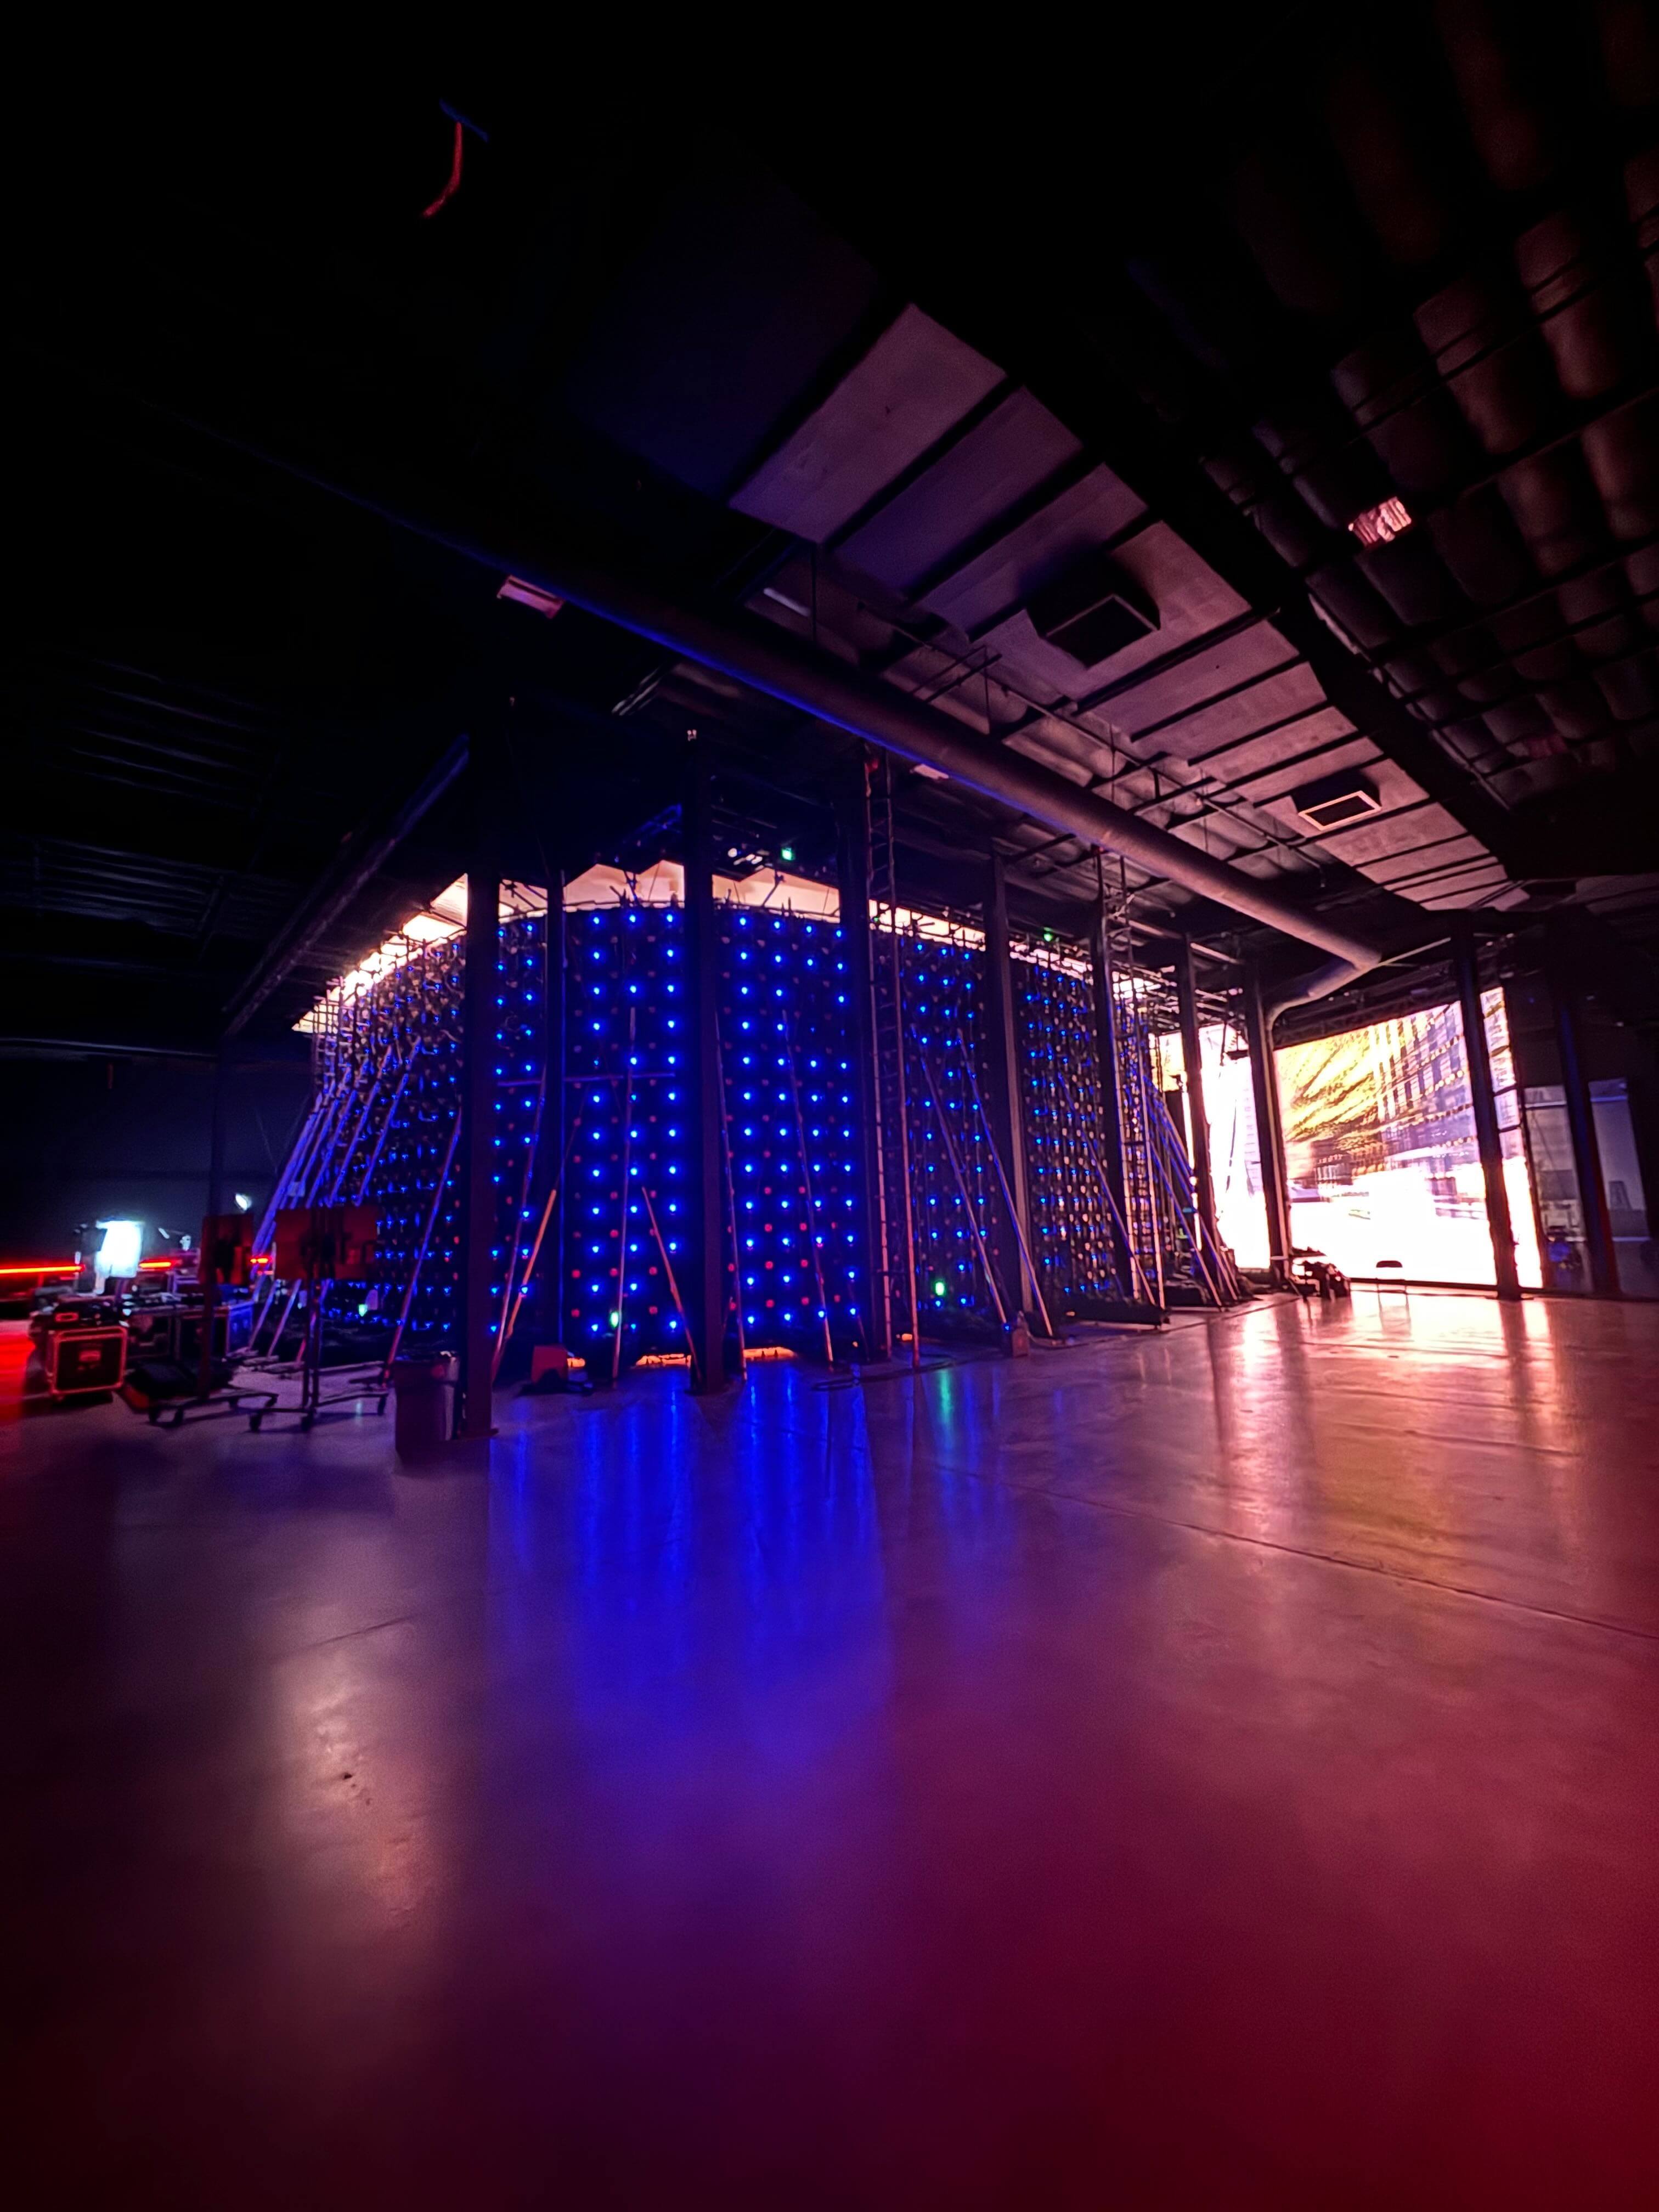
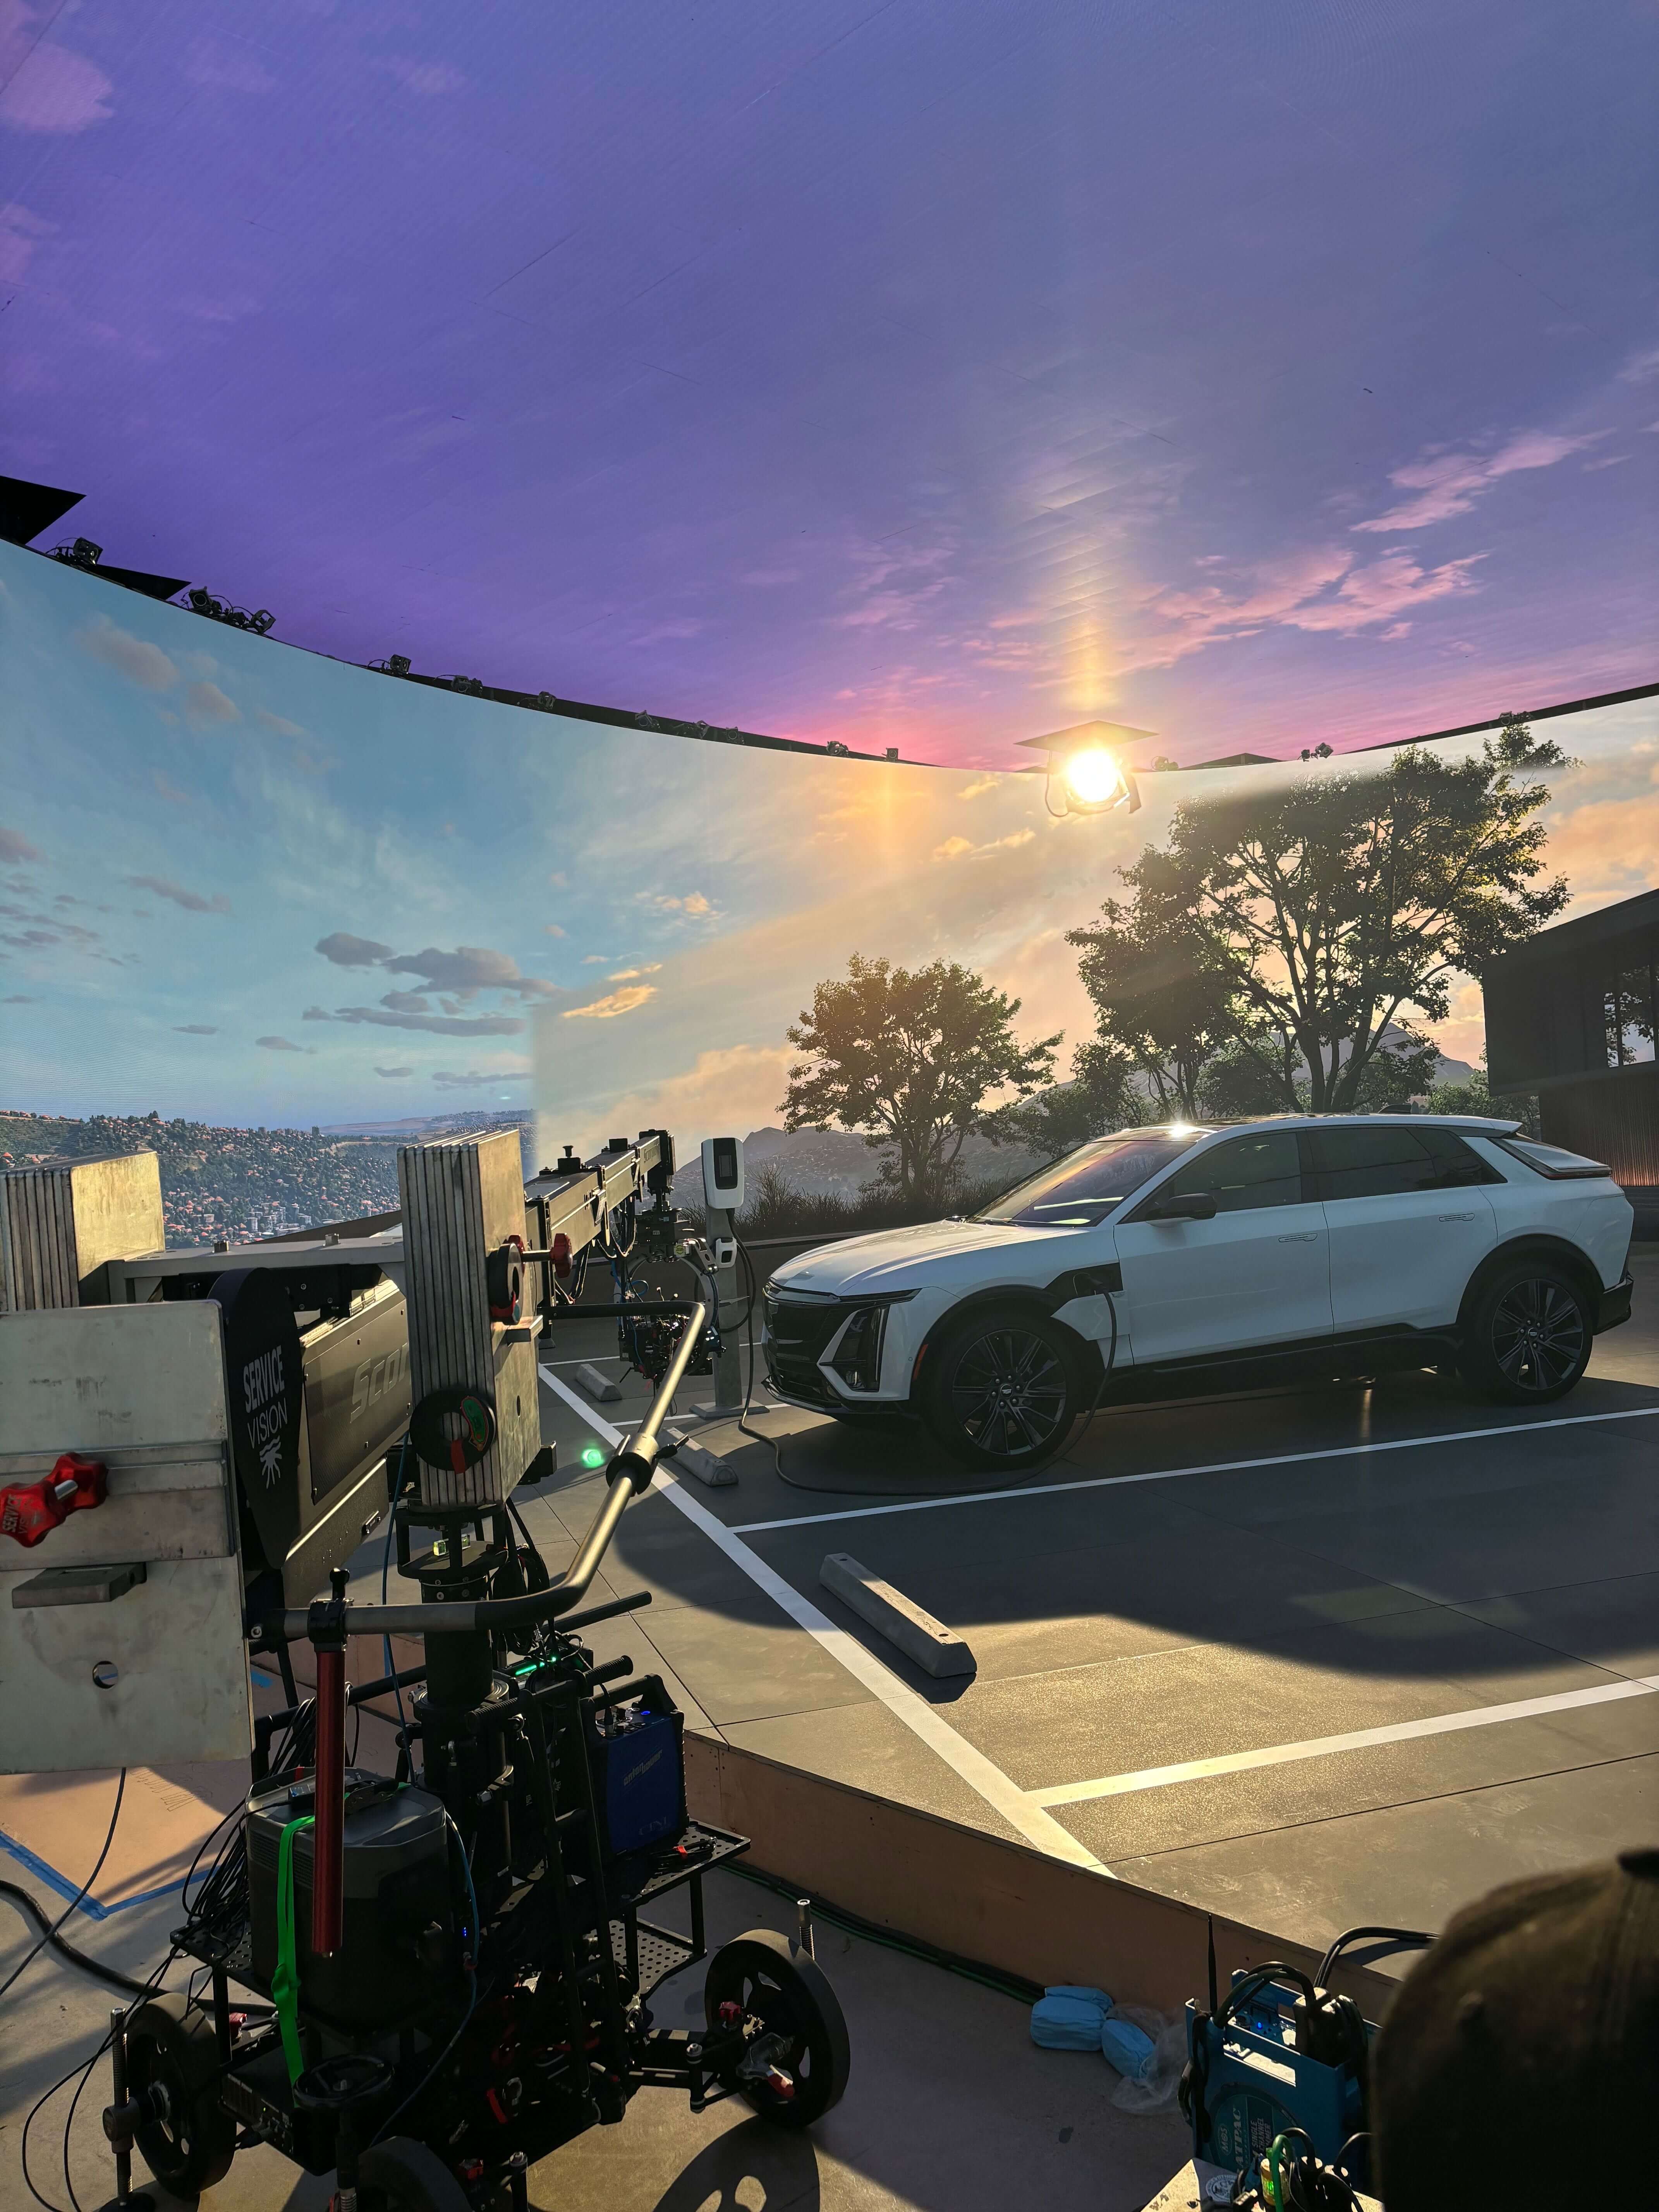
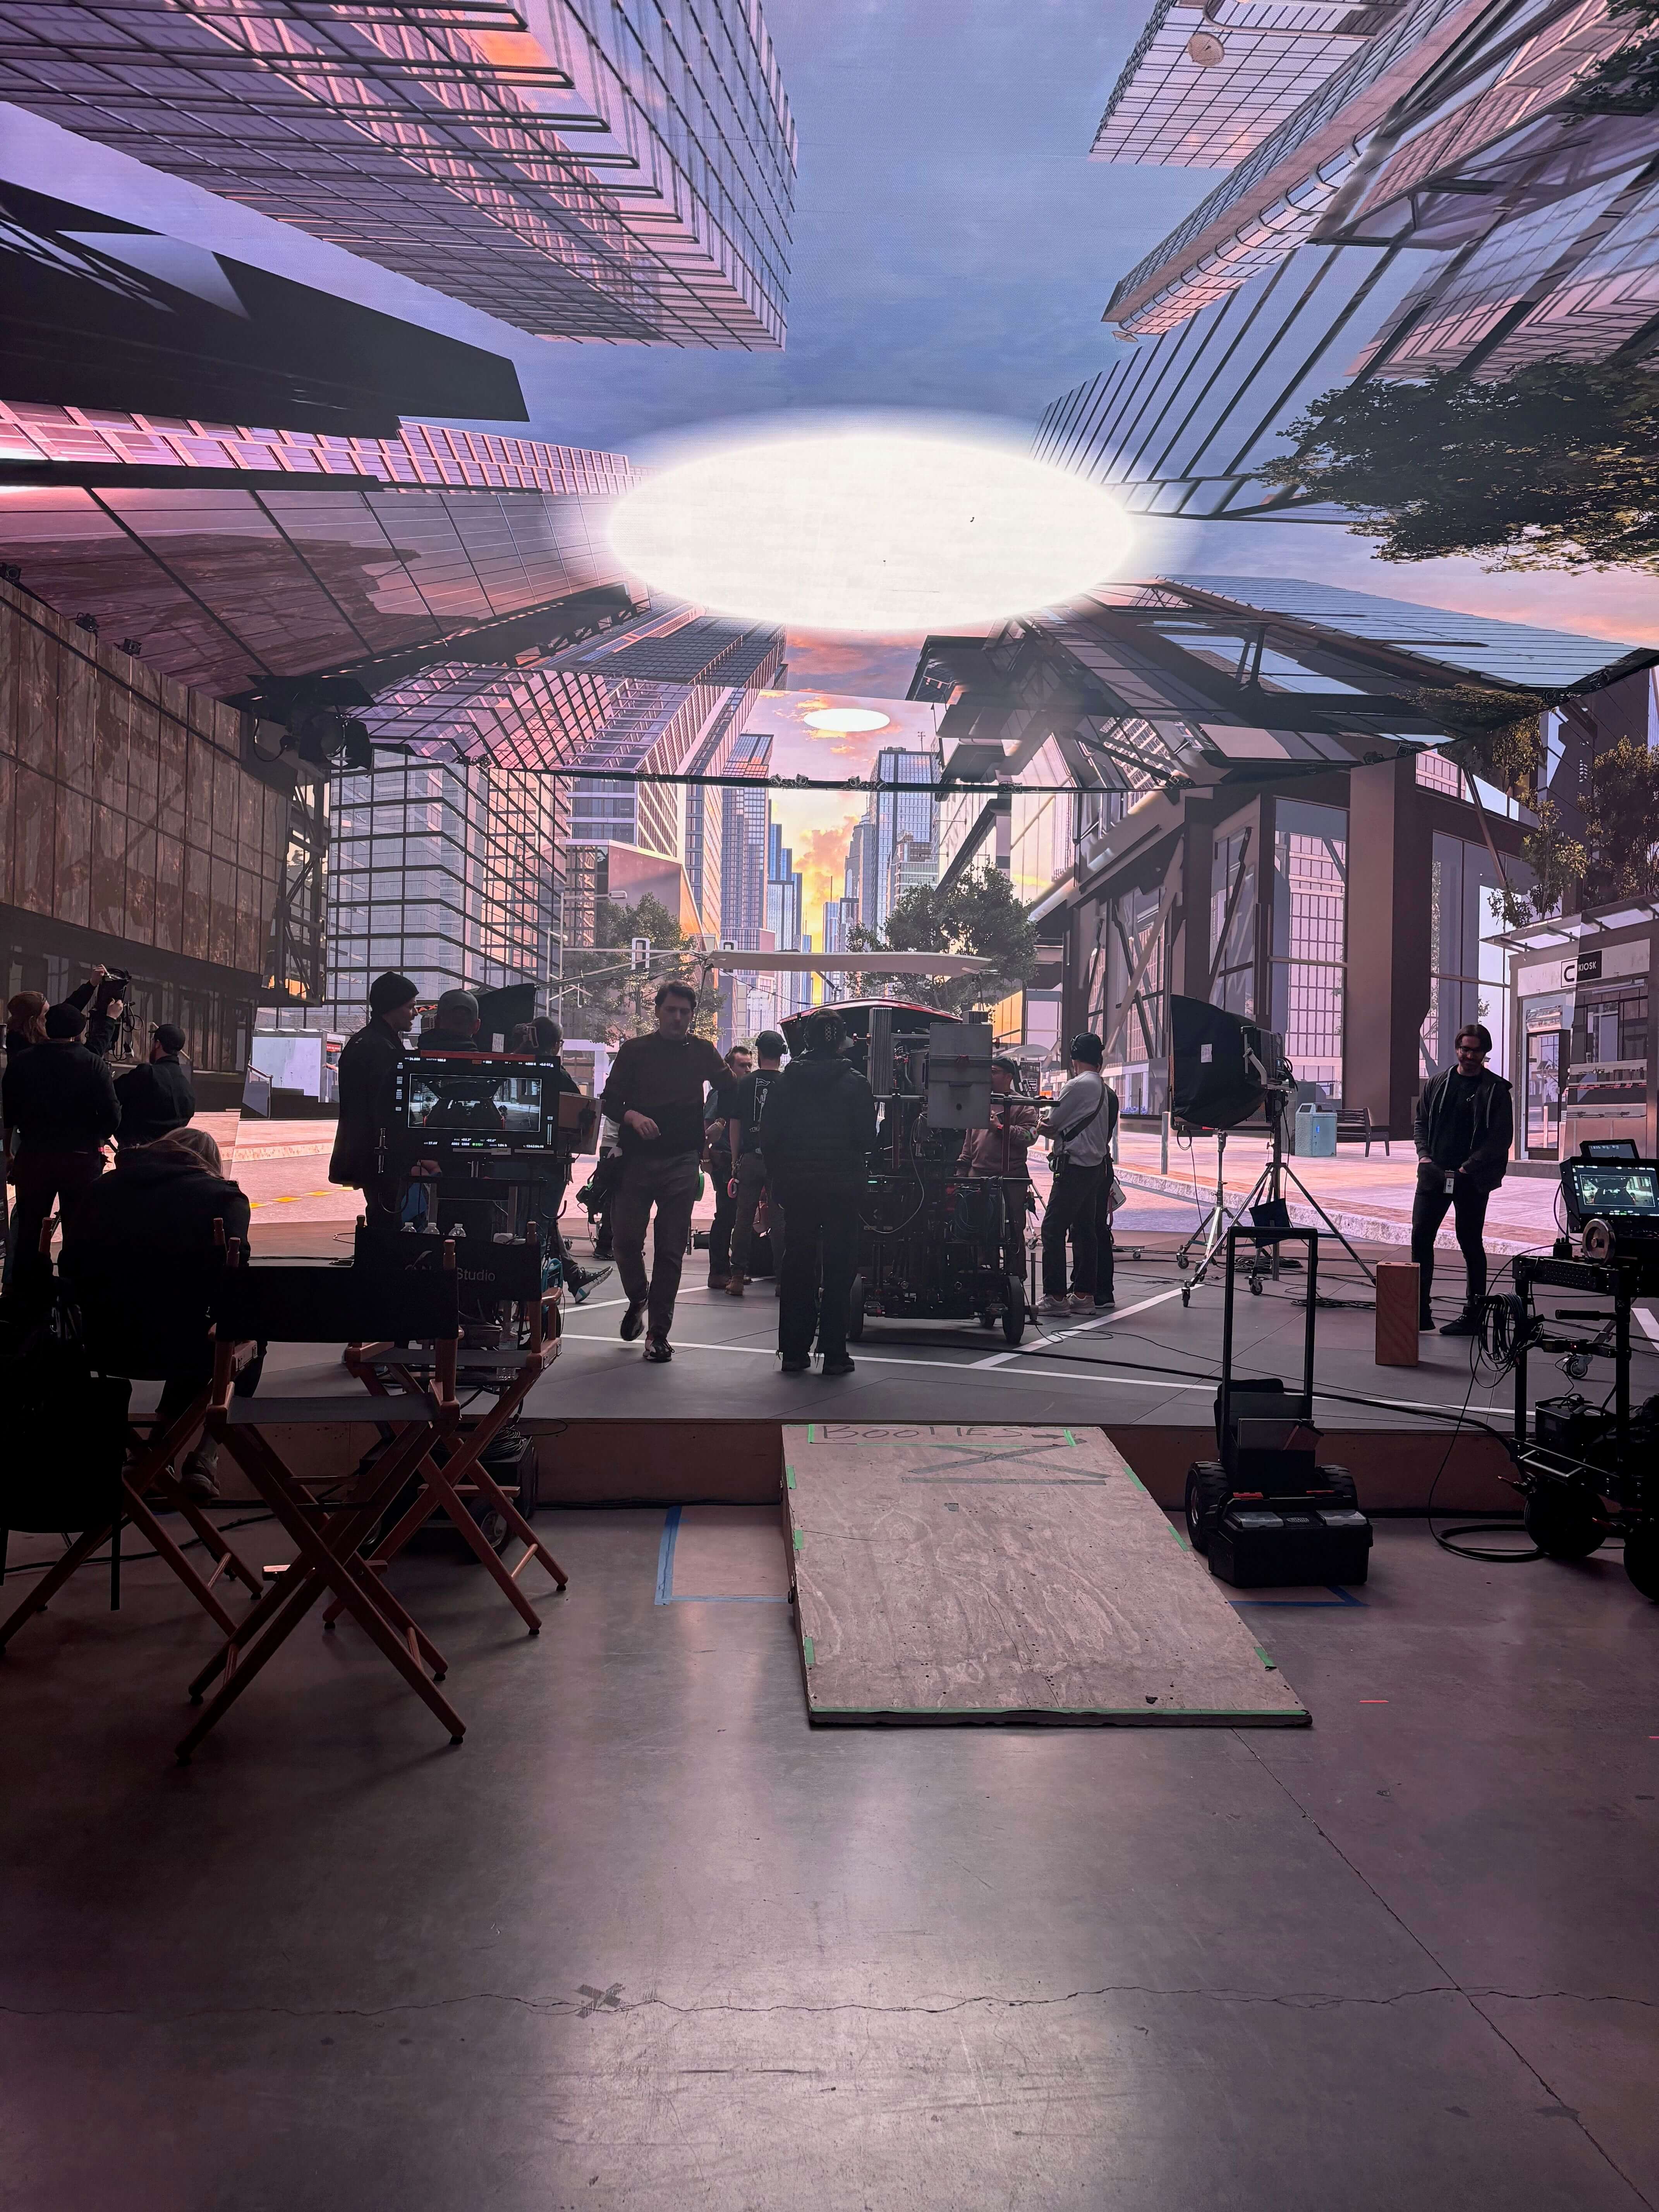
LED walls used to be this big scary new tech. In the early days things like hertz and frame rates would be either a mystery or a guessing game, lighting was a challenge, and camera tracking was a nightmare. The playbook had not yet been created. Just like with the advent of LED lighting, things take time to adjust and integrate into workflows. You realize what systems need improving, understand your base standards for execution, and figure out all the little quirks and tips that come with new technology.
We put the virtual production workflow to the test during our shoot for Cadillac.
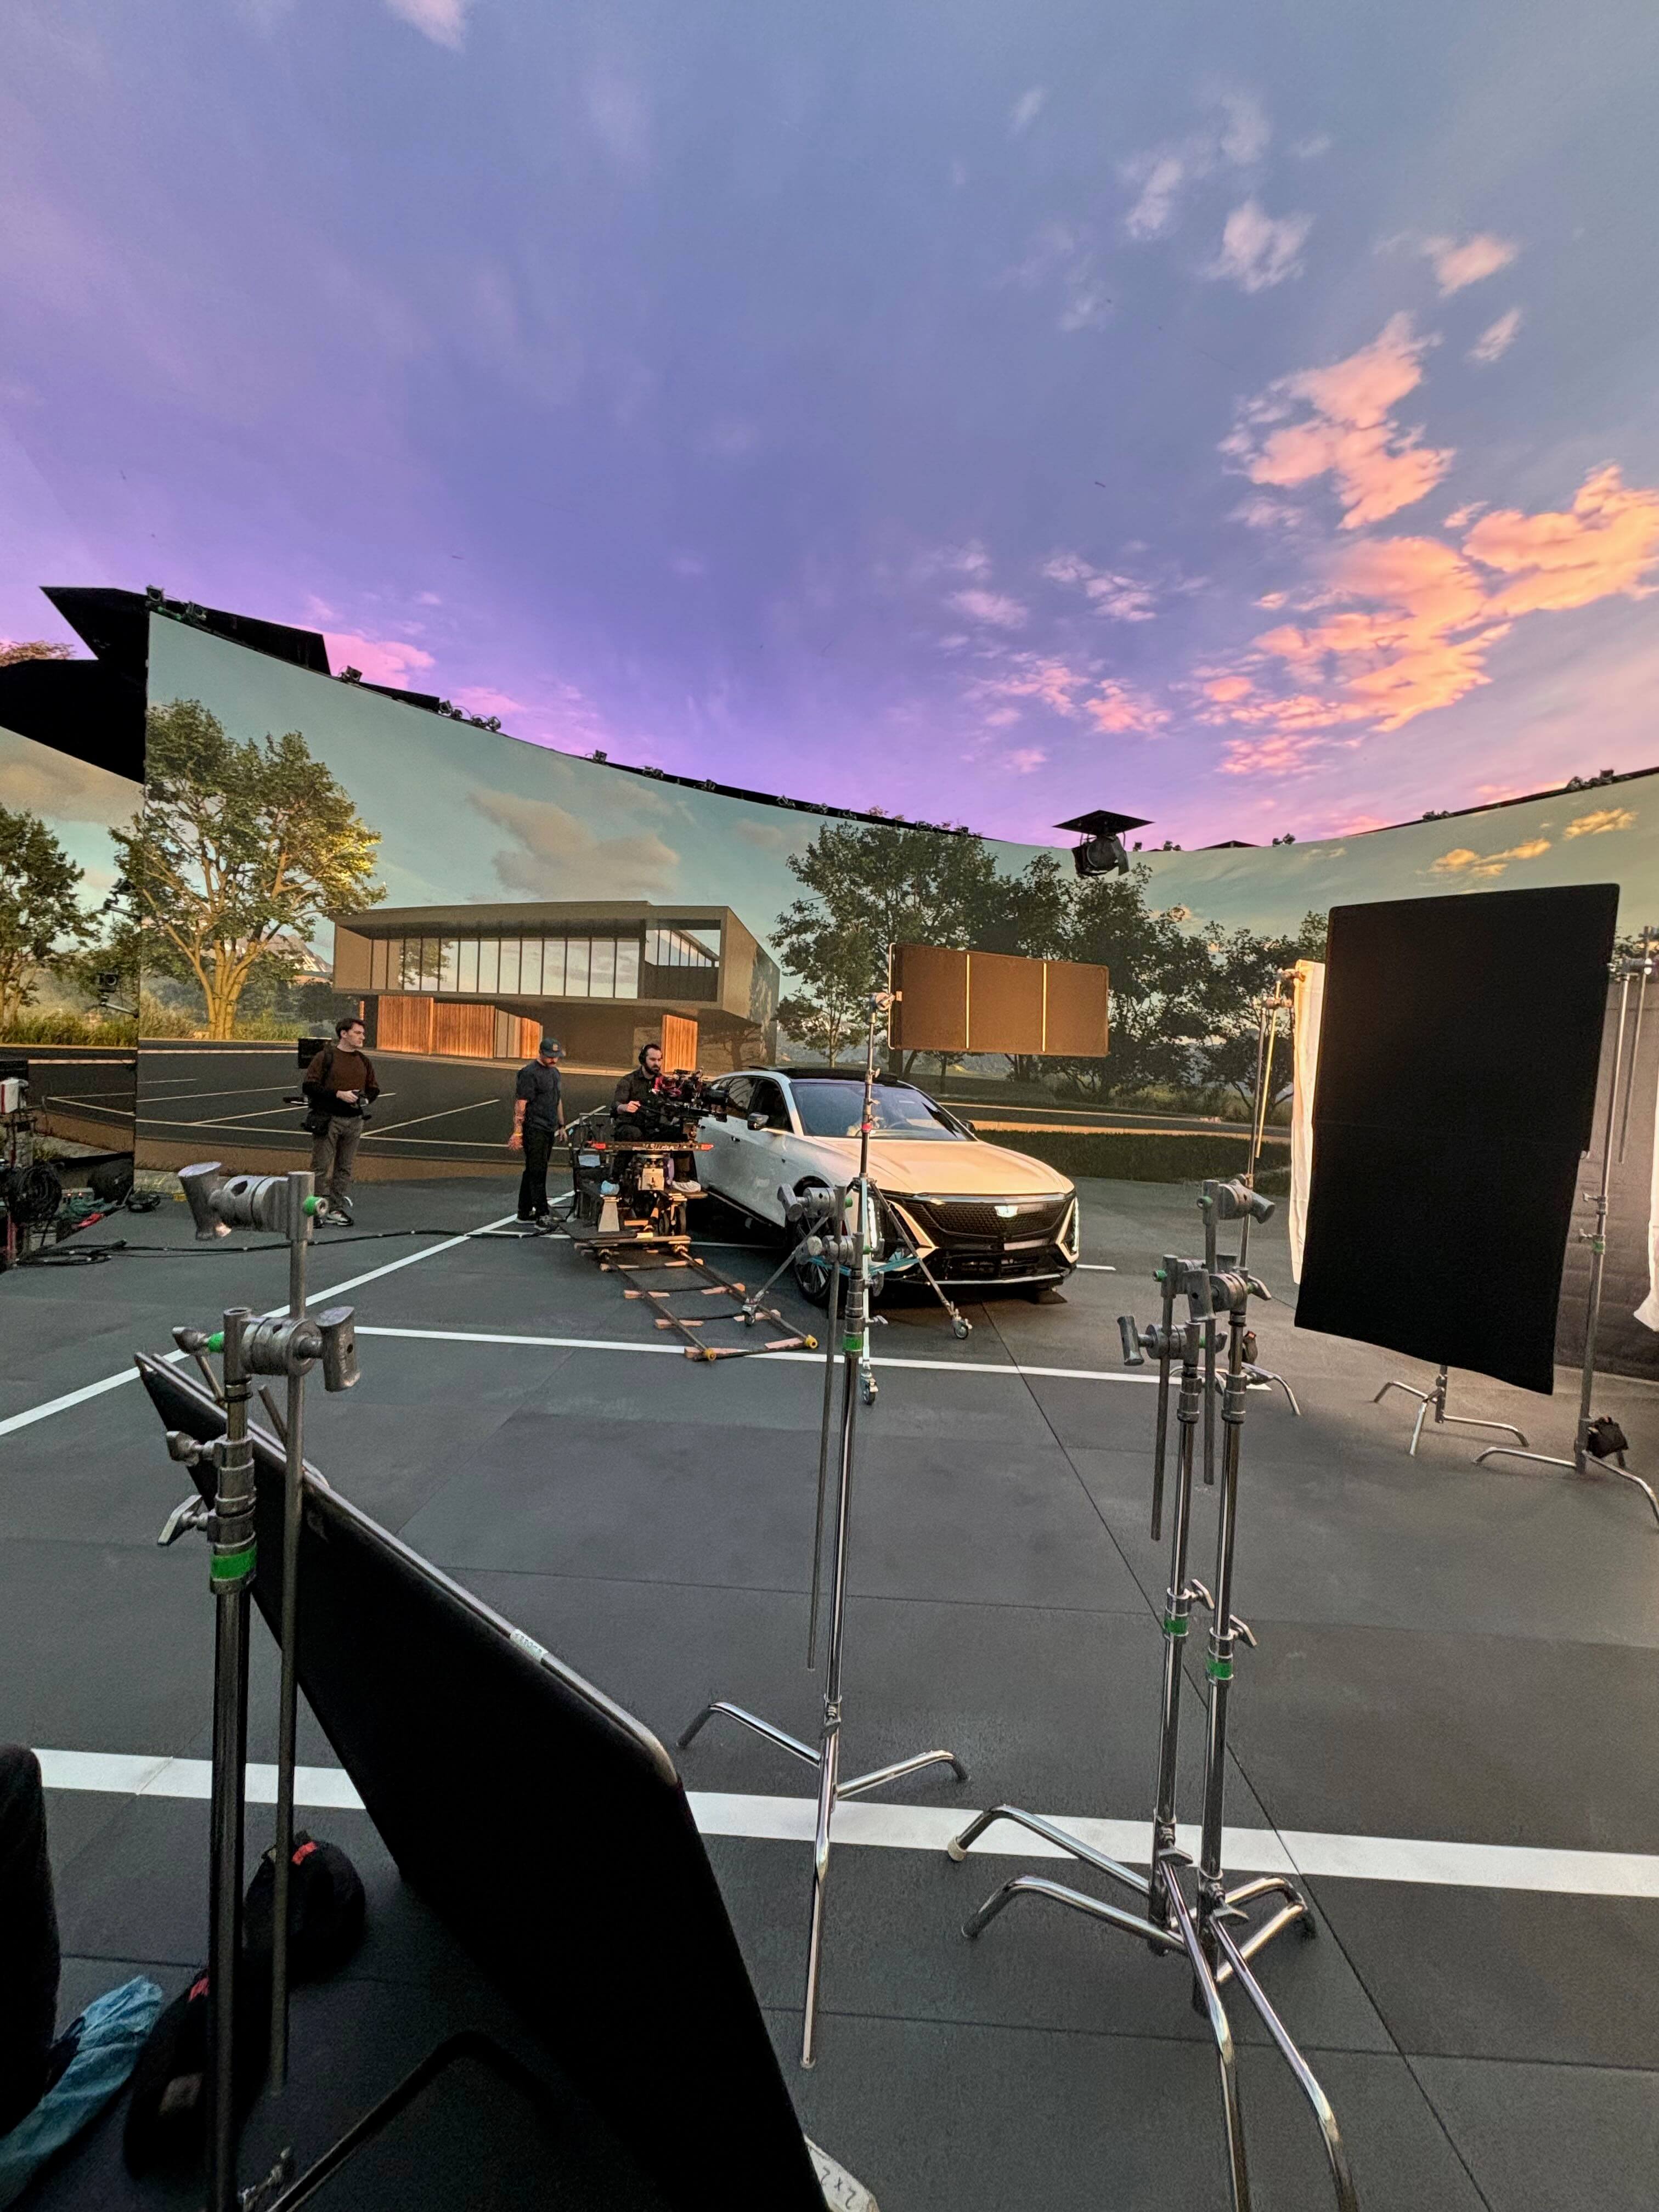
With one combined prelight / tech rehearsal day, and two shoot days, this set of Cadillac TVCs featured 5 different vehicles in 6 different virtual environments. All of the vehicle interiors for the spots were captured with ICVFX (in camera vfx) on Nant Studio’s LED Volume 1 in El Segundo. With the help of some extensive prep & previz, Brendan, Vince, and I were able to move at record pace for a commercial with intricate technical requirements.
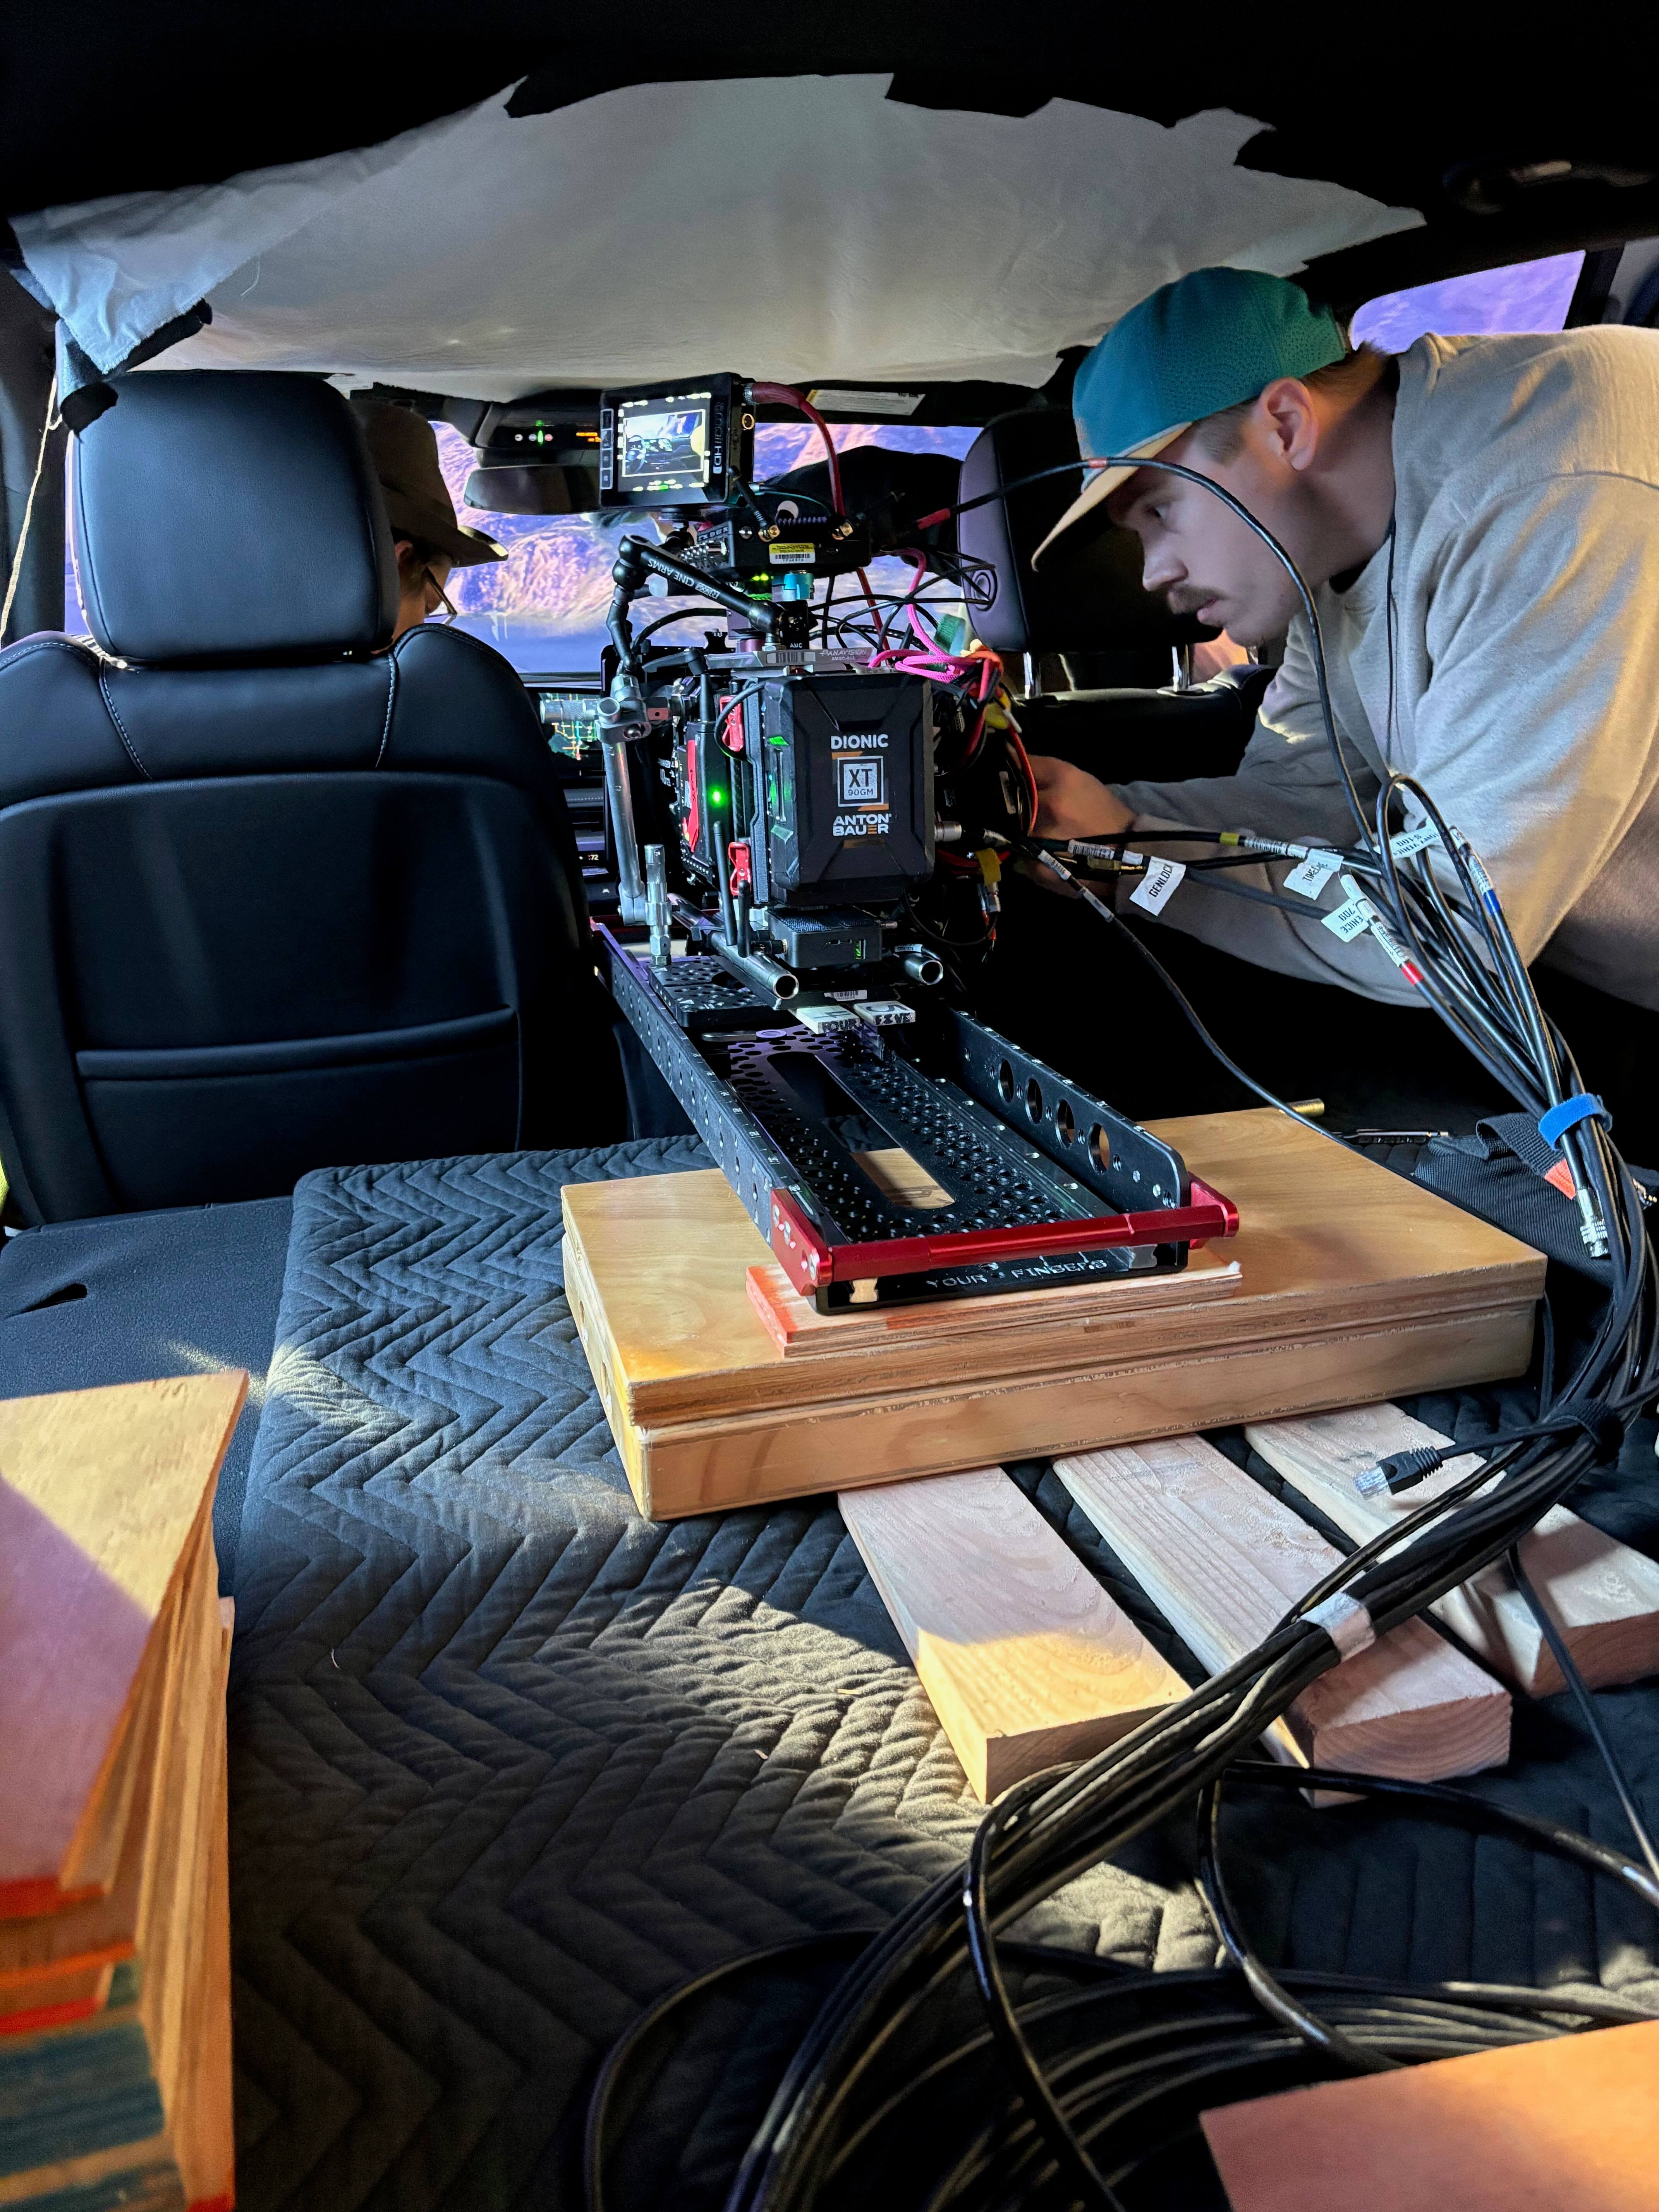
Camera Support
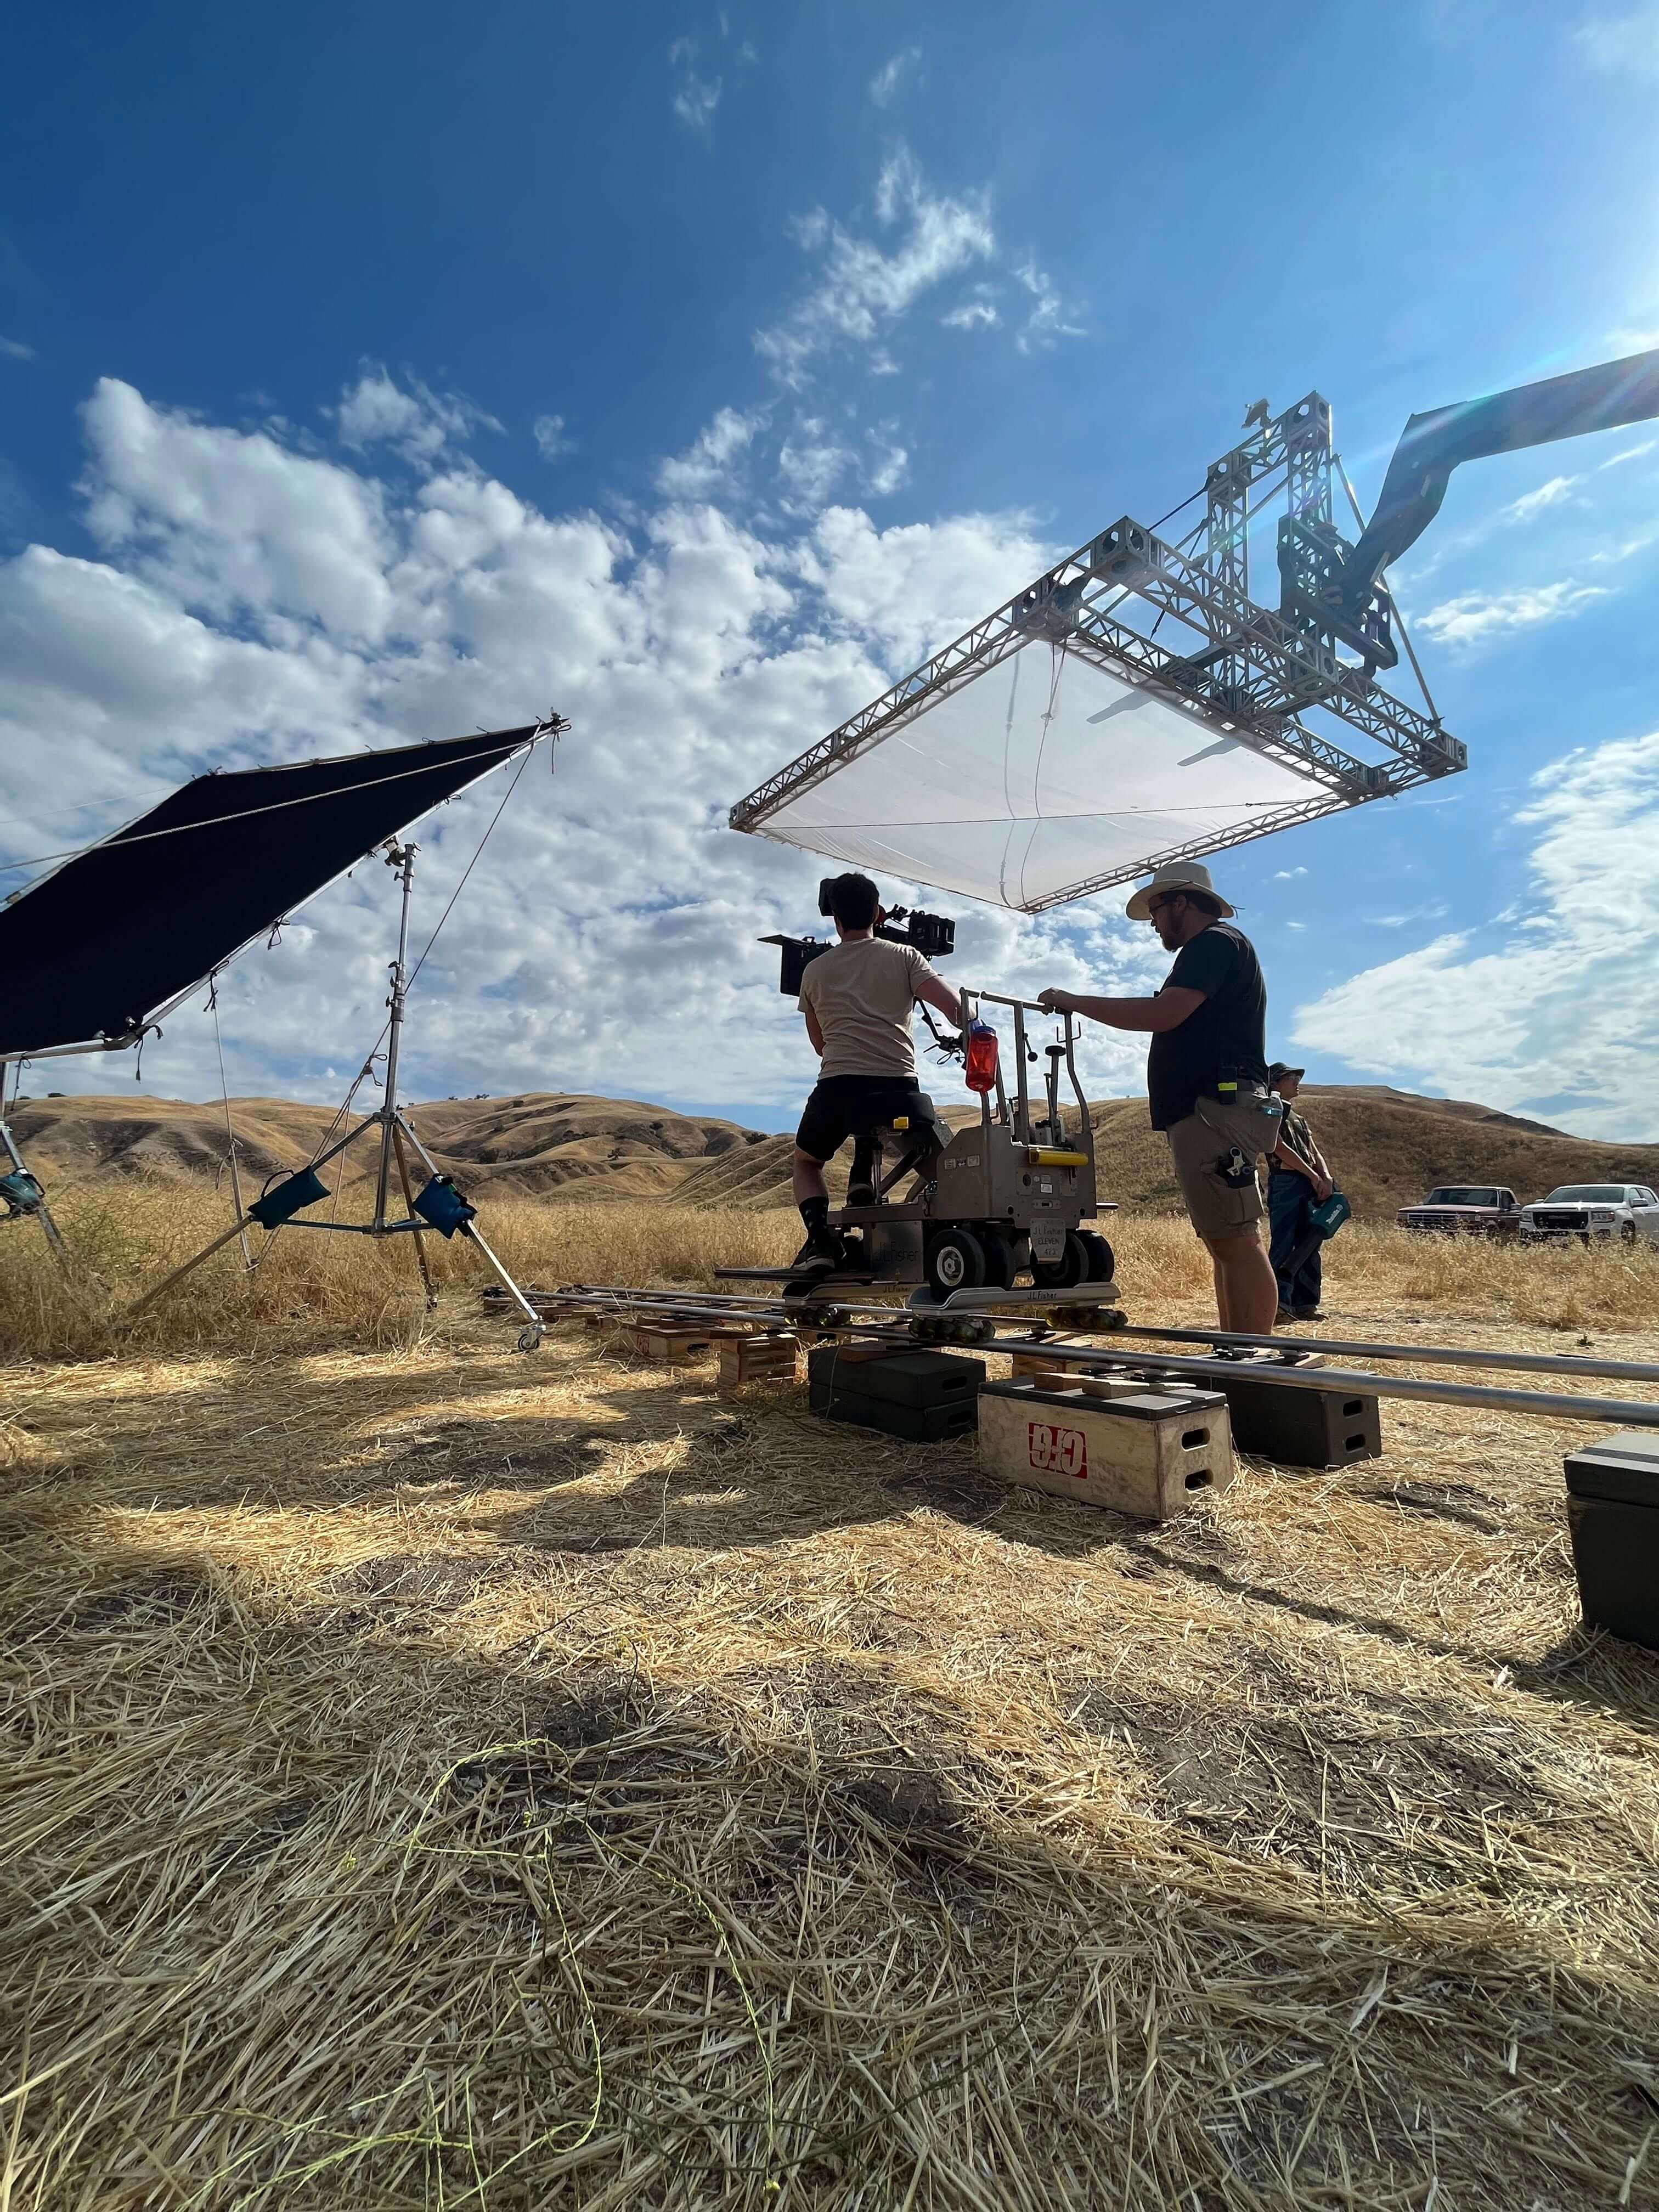
The Setups
With 6 different setups, it’s important to distinguish the various challenges that each might entail. As both the DP & Virtual Production Supervisor overseeing the previz, virtual environments, and final vfx shots, I’m in a fortunate position to help dictate how these things get broken down at the granular level. As far as grip & camera goes, this meant talking with Brendan about what I was trying to accomplish through both previz & prep conversations. We determined that the general footprint would be relatively small, with a clear focus on camera support. However, with several talent inside vehicles (several of which were dark leather) Brendan, Vince, & I knew there was still plenty of lighting to be done as LED walls—while great for reflections and ambience—did not provide the push required by the look I was going for.
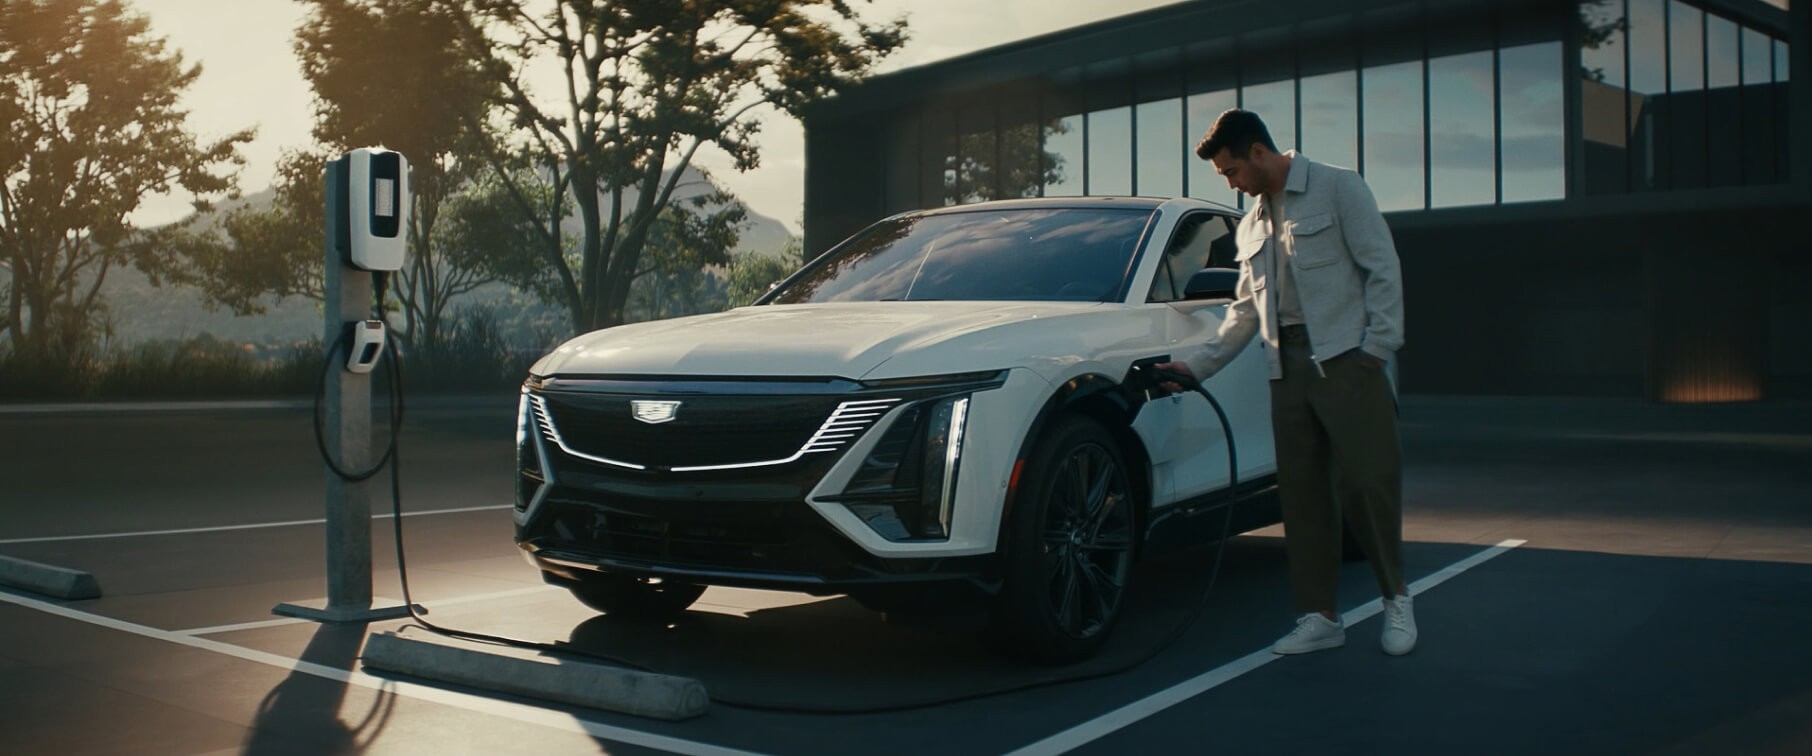
Day Ext. Museum Parking Lot - Static
Arguably the simplest setup, this was done with a precision placement for a T12 (as the backlight) that was planned during the tech scout. This was the only point put up in the LED ceiling (the stage has to remove a panel to make way), and we lined it up just right thanks to some help from tech viz lighting plots I made. It was important to pick a spot that both rake the floor in a pleasing way, as well as not reveal the unit in the reflection of the vehicle windshield. Outside of that single unit, Brendan and I made use of the virtual grip tools available in ICVFX: a large clean blue card on the right side to help clean up the reflections in the side paneling, and some virtual negative (essentially turning the wall off) behind camera so that the front grill of the vehicle wasn’t getting too many distracting pings.
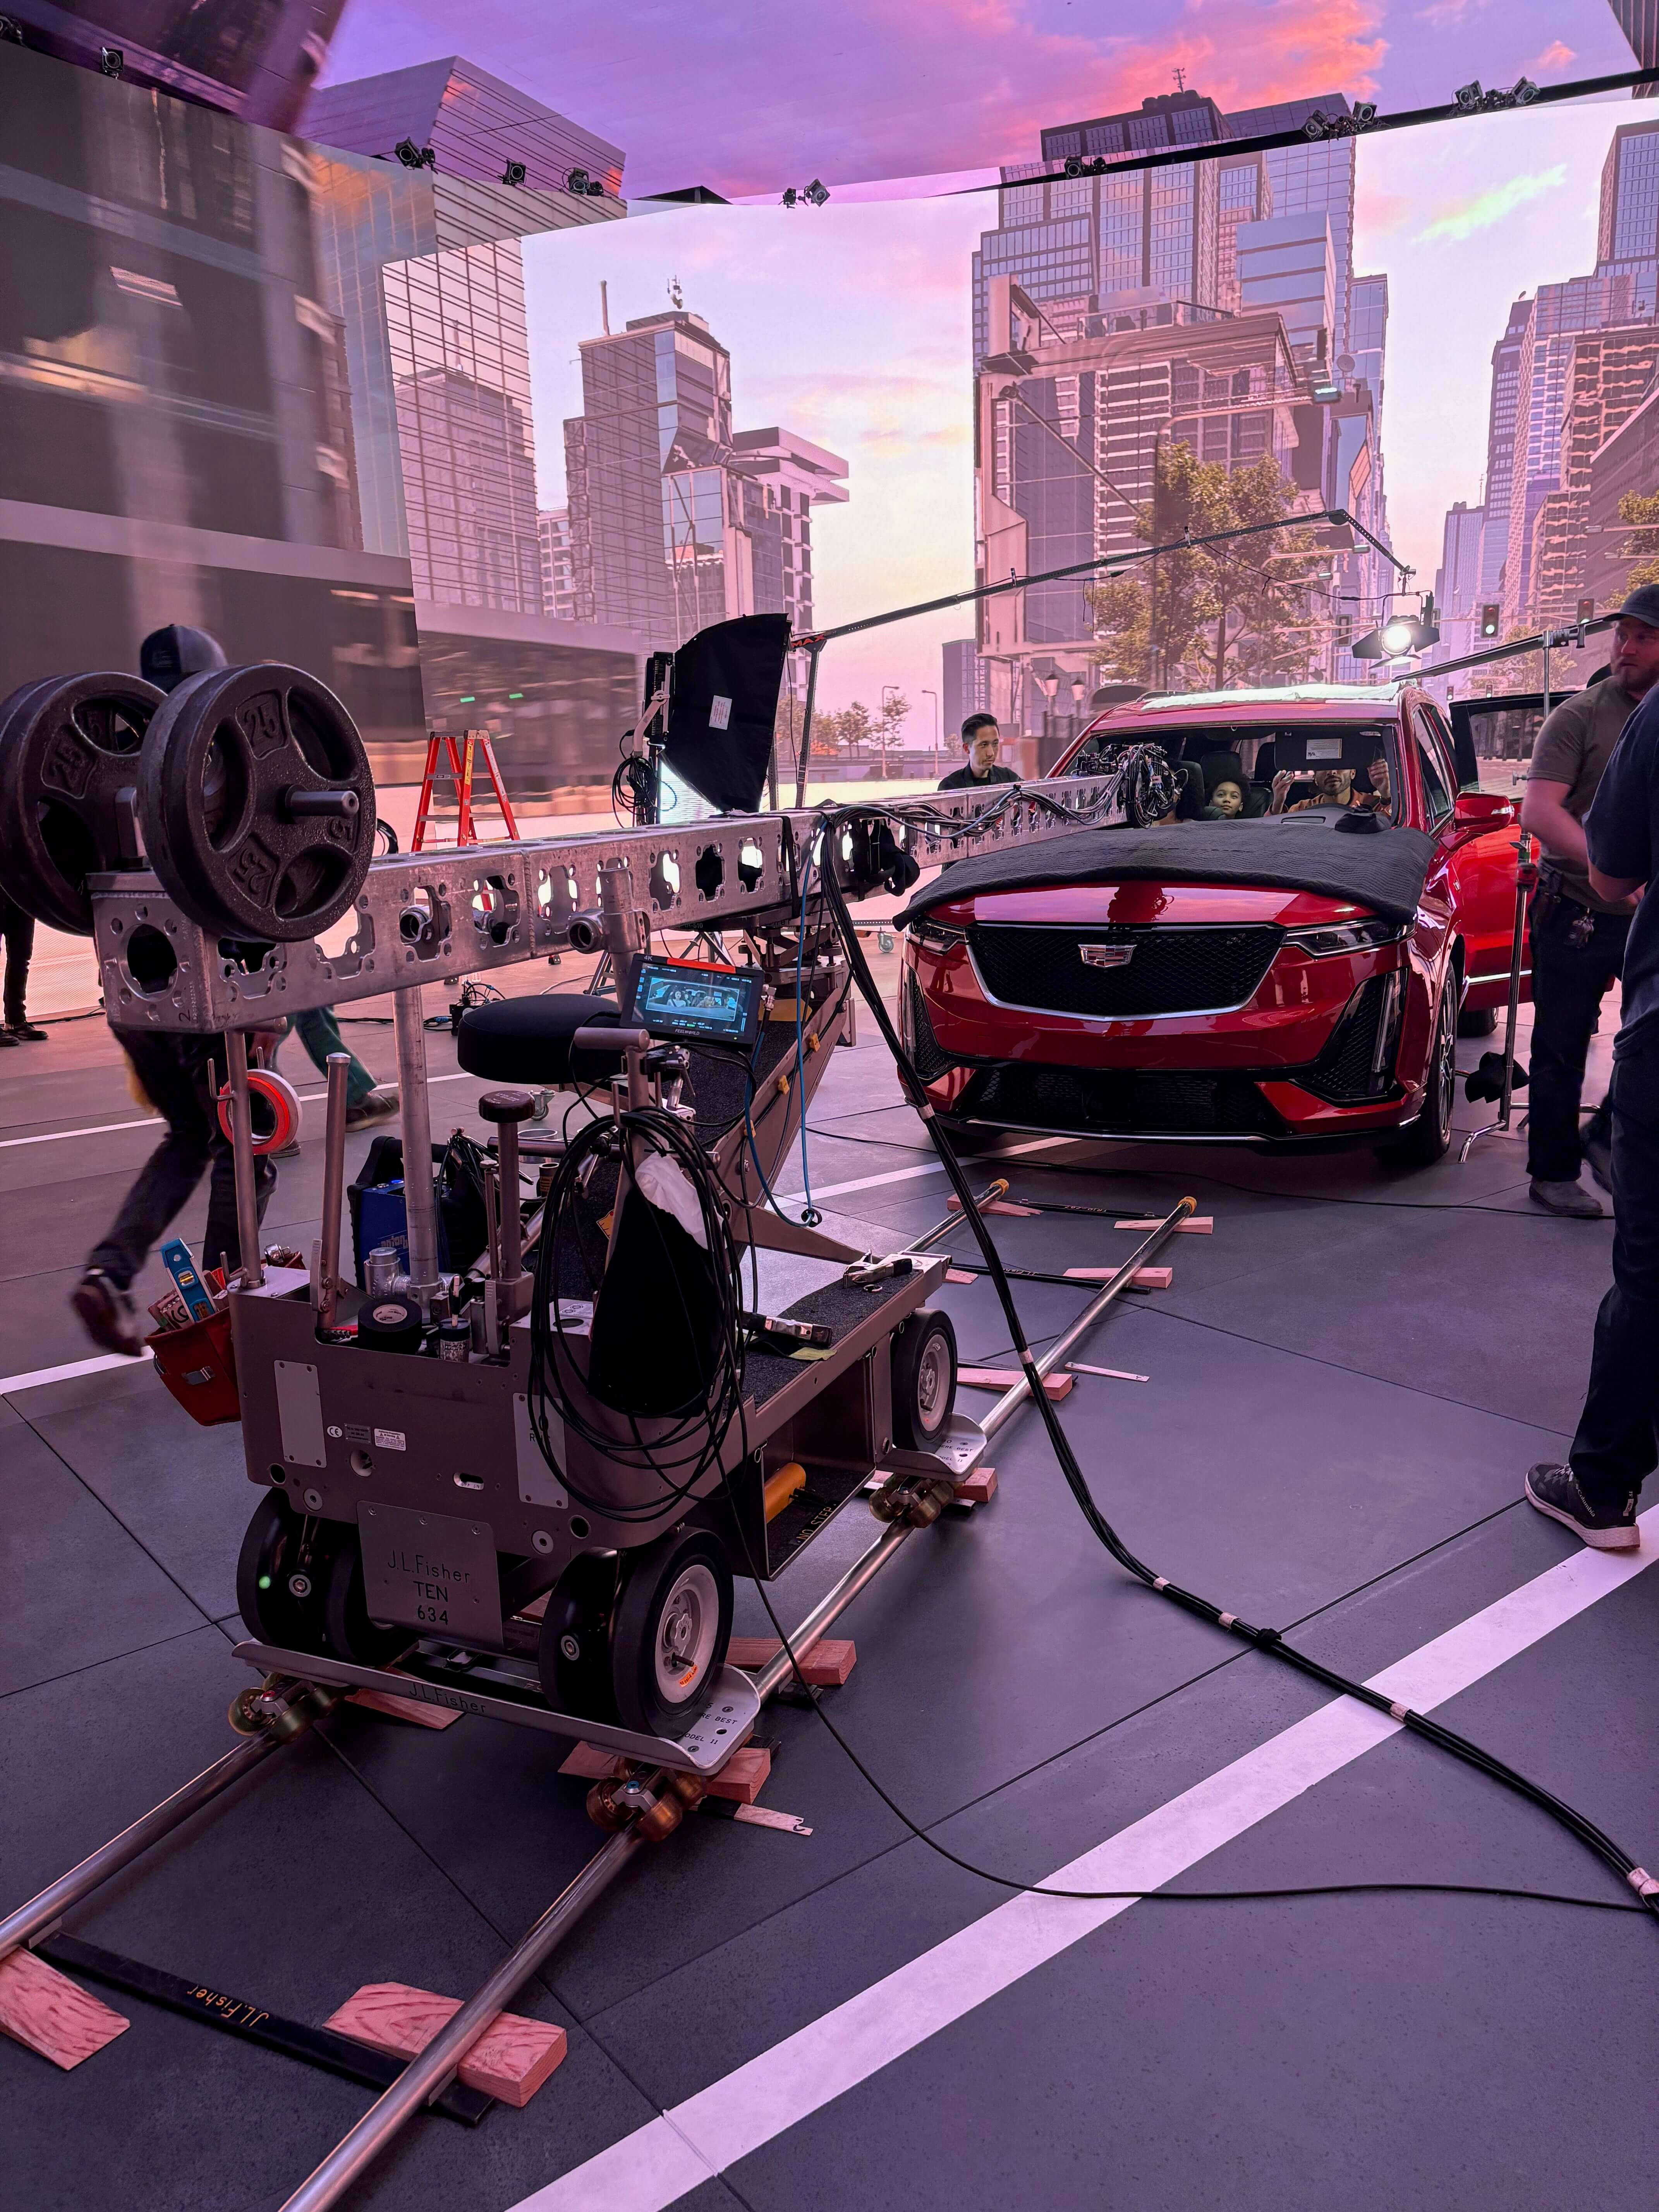
Day Ext. - Downtown City - In Motion
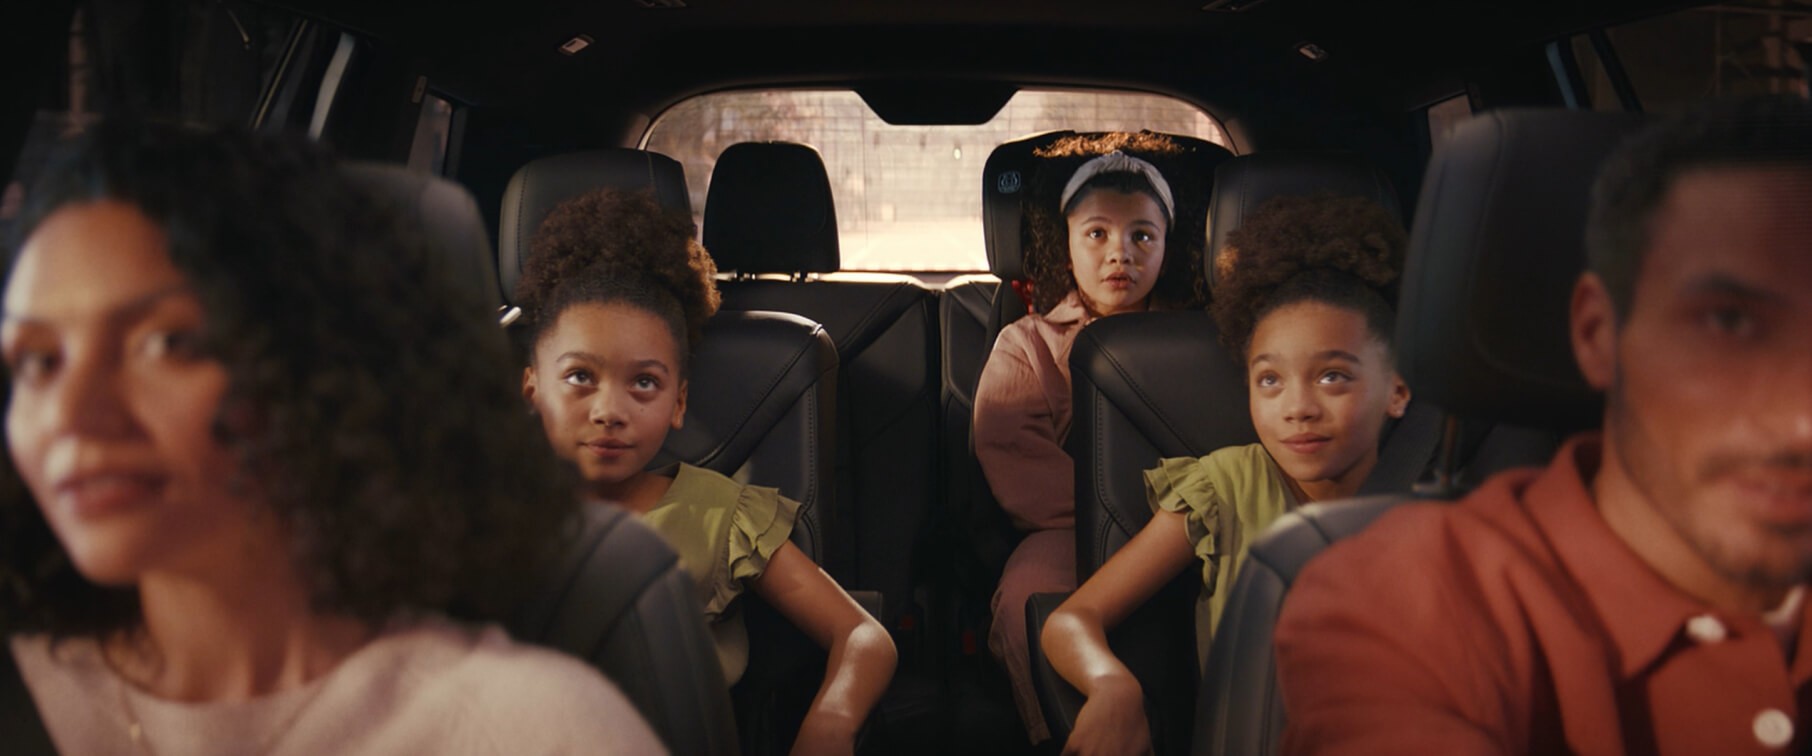
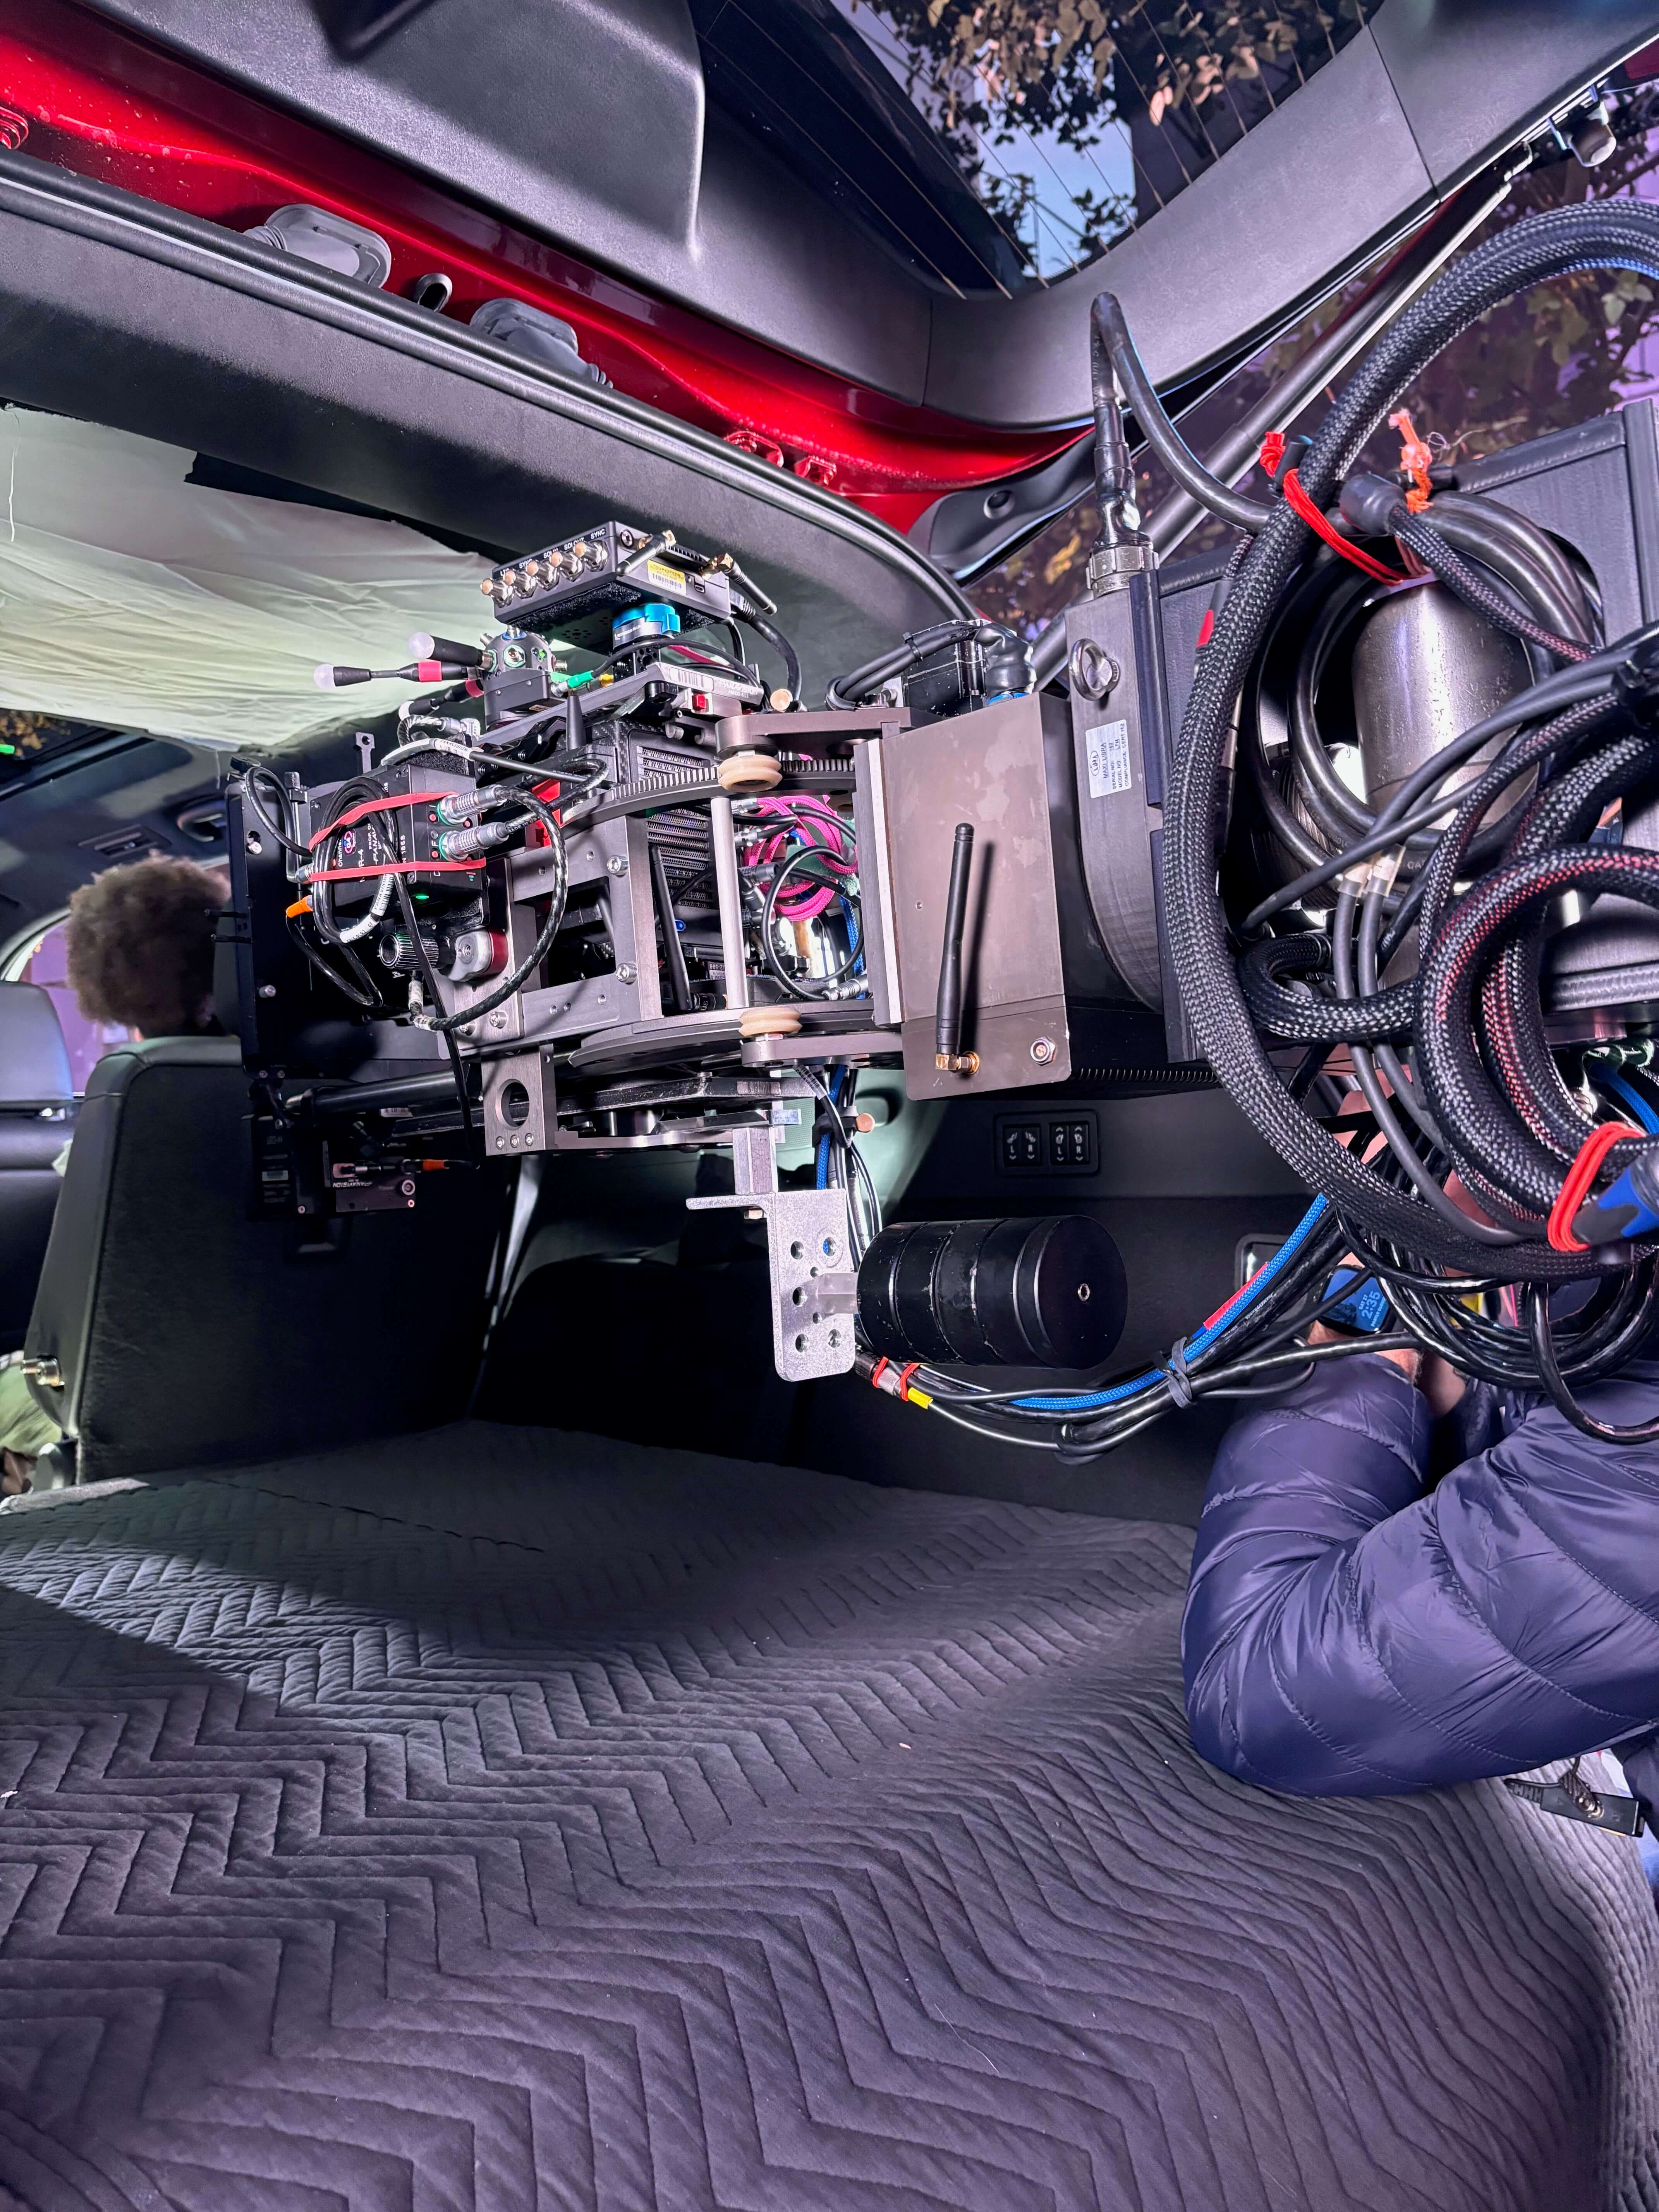
Brendan and his team made excellent use of a custom Modulus-X rig to get the camera through the front of the SUV (more about this below). With such a dark interior, I definitely had to keep pushing more and more light to bring out the detail, and it was equally as important to cut those units properly to fake some slashes as well as control the fall-off through the various seats.
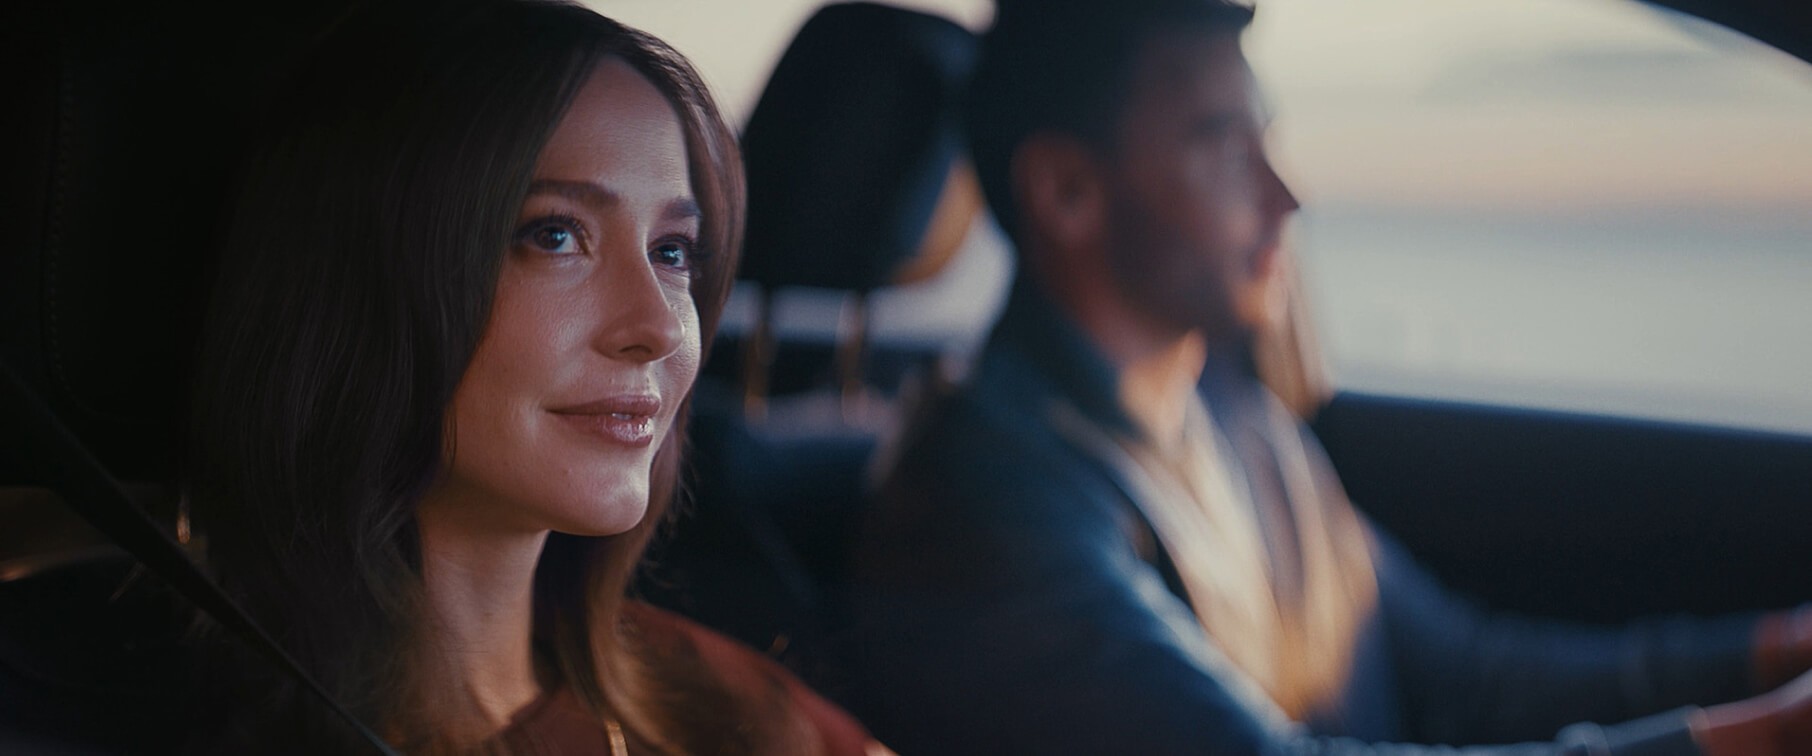
Day Int. - Coastal Road - In Motion
This clean profile with a sunset look becomes much simpler to accomplish: add an 8’ soft push through the front windshield that has the blue/purple tones of the overall ambience, and a sharper & warmer patch of light from a more backlit position to cheat the setting sun. I think this was most likely a Skypanel or Vortex through some grid cloth, and a Leko through opal frost.
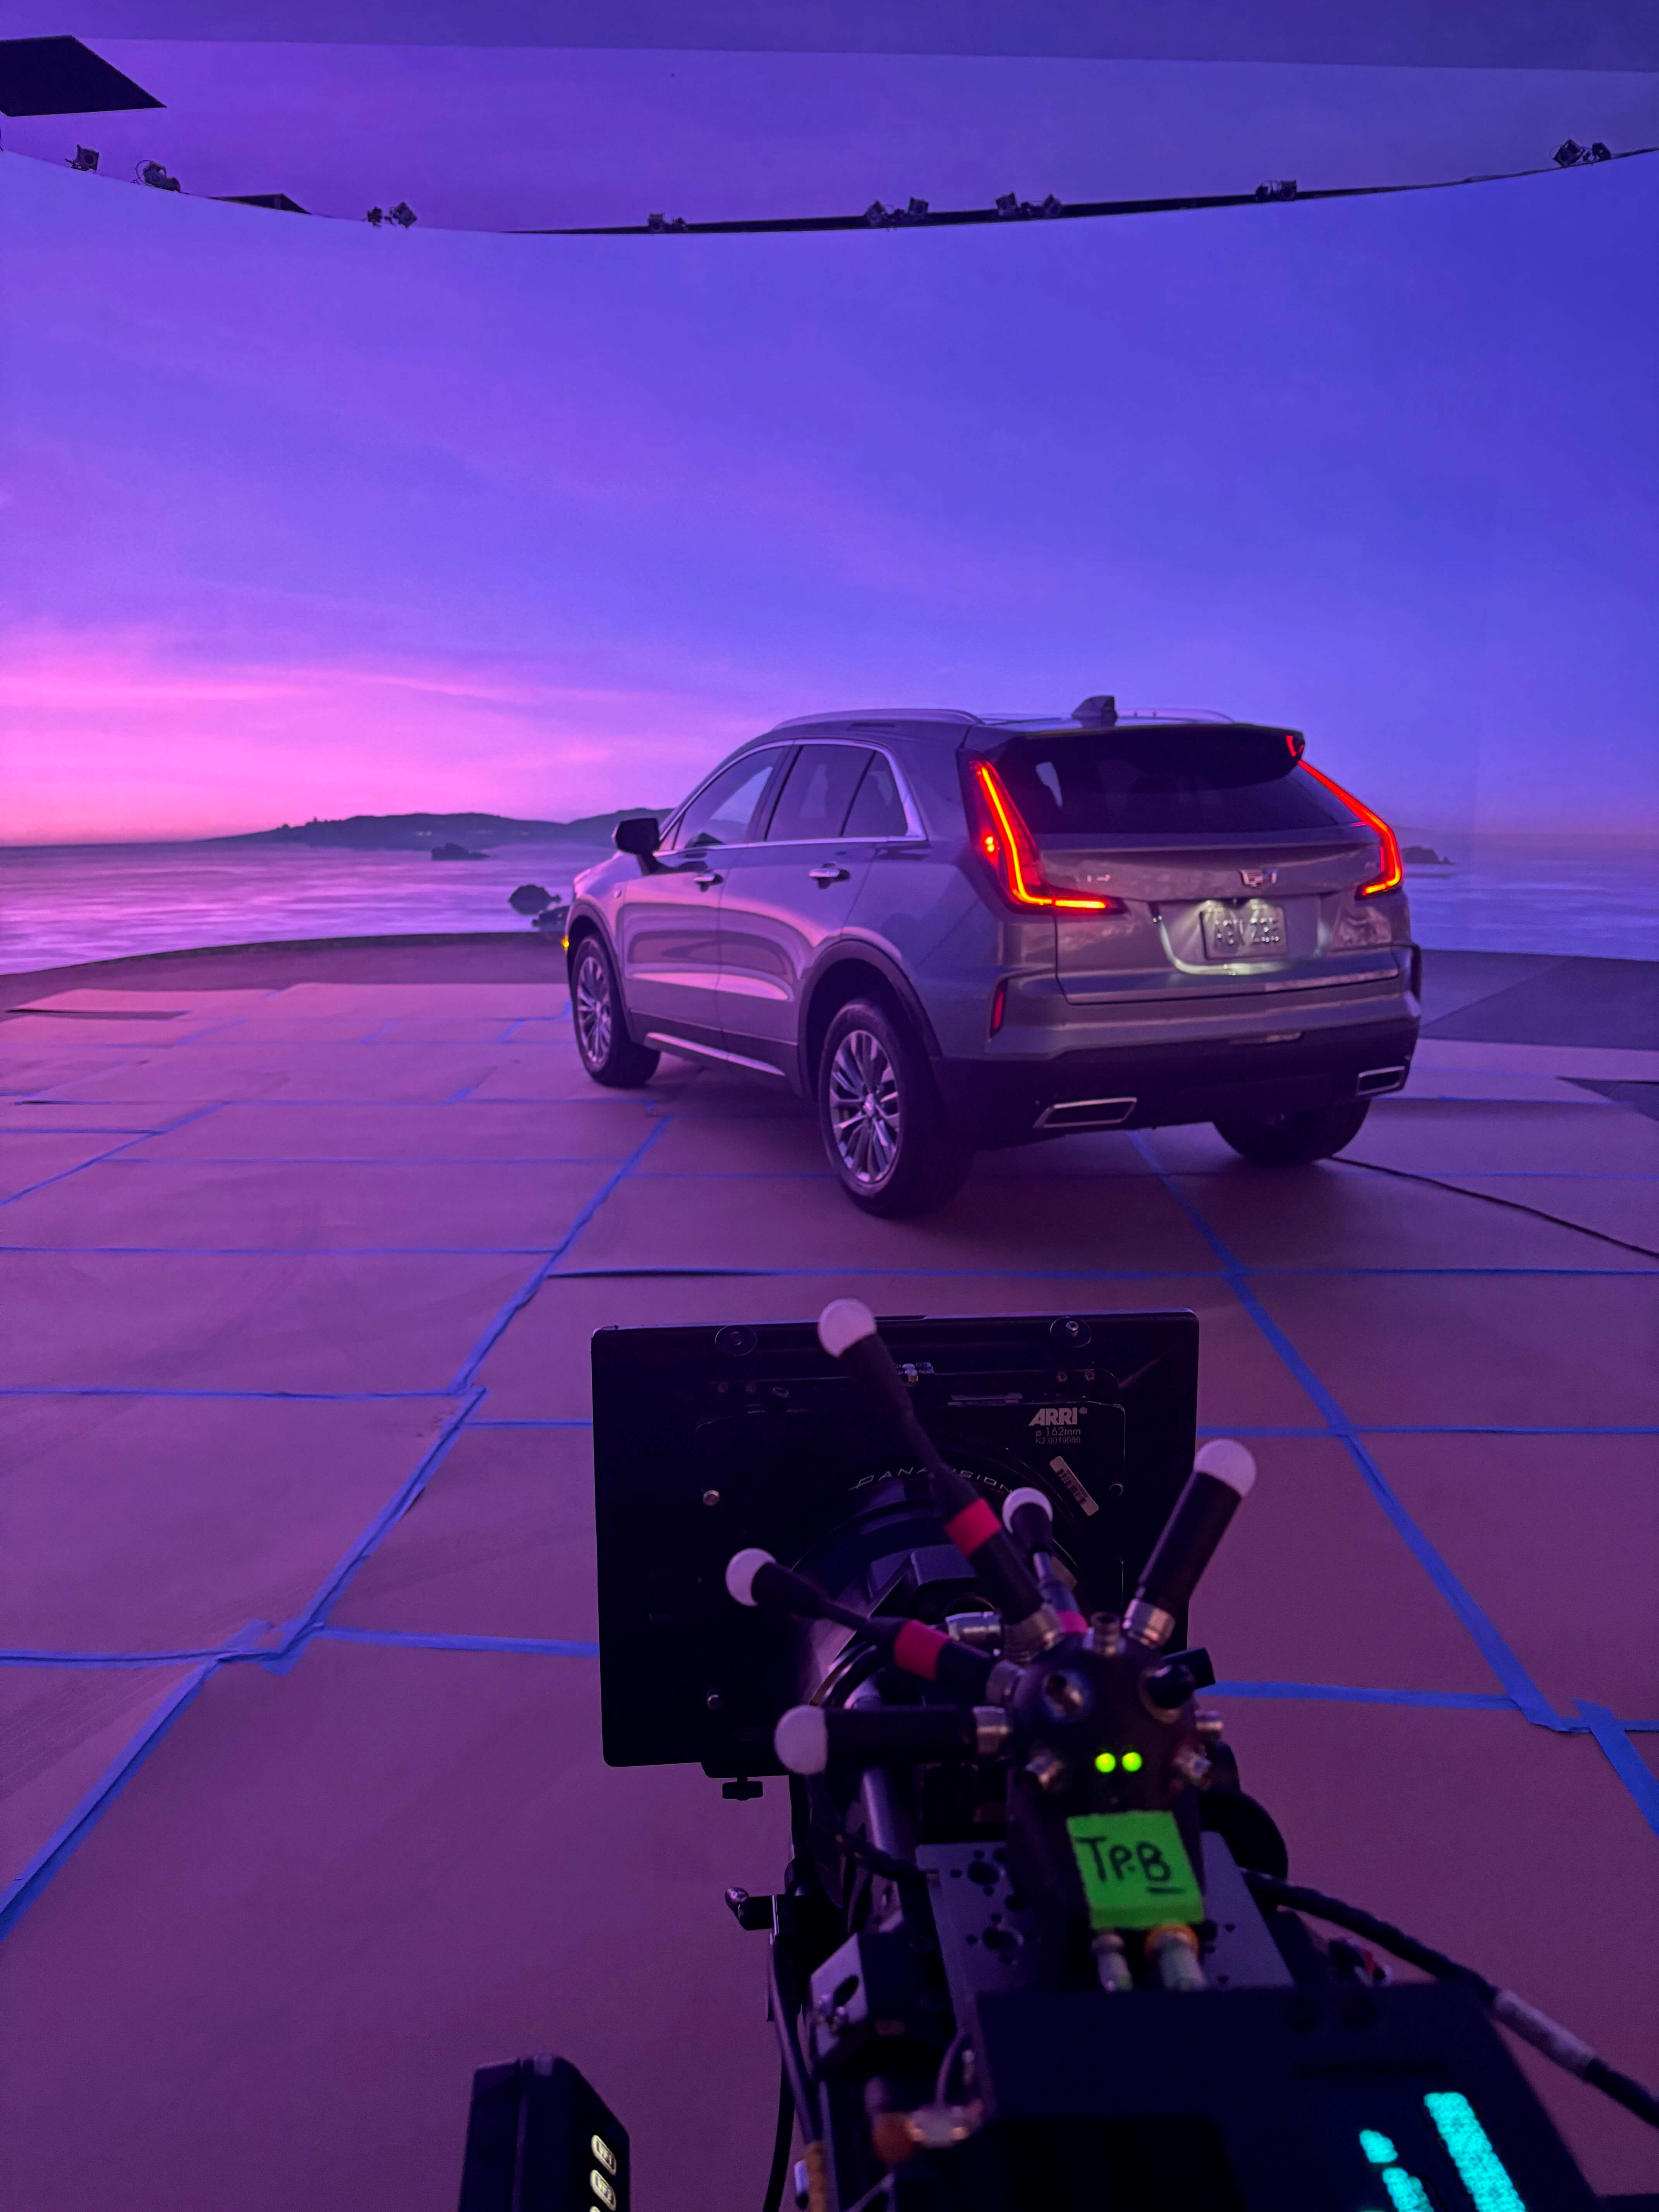
Night Ext. - Coastal Overlook - In Motion
A fun orchestration of camera and vehicle movement lead to what I believe is a completely believable “car pulls up” exterior moment. Timing with the crane and car landing at its mark was meticulous, despite only being maybe a 10ft move. Add to that the requirement for a super subtle soft key that had to be gripped off the vehicle so it wasn’t obvious from the outside & ground, but still have enough presence to push through the side & front windshield.

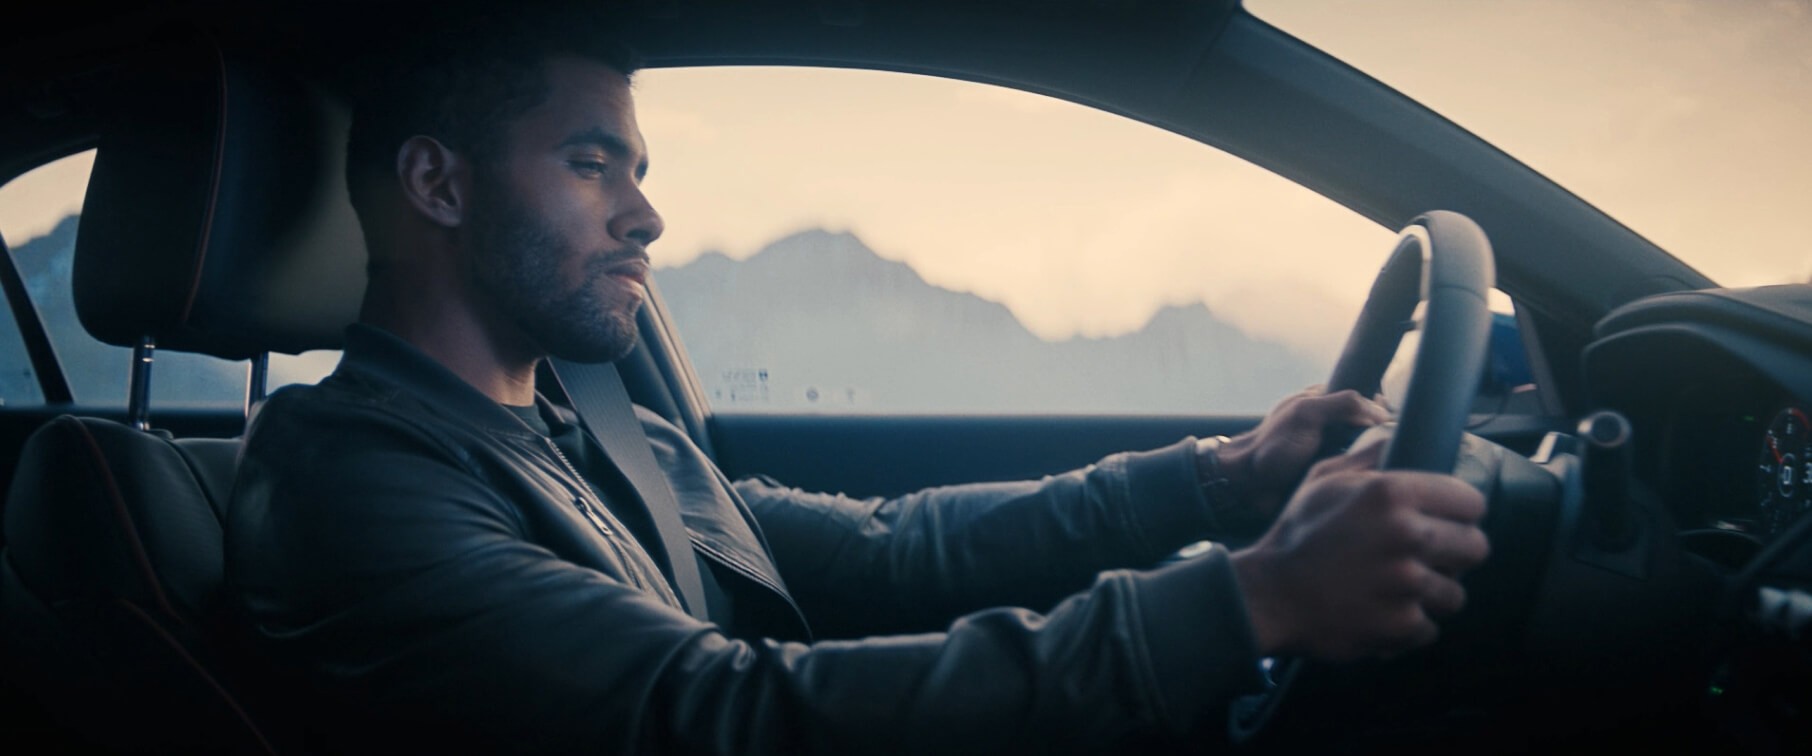
Day Int. - Mountain Road - In Motion
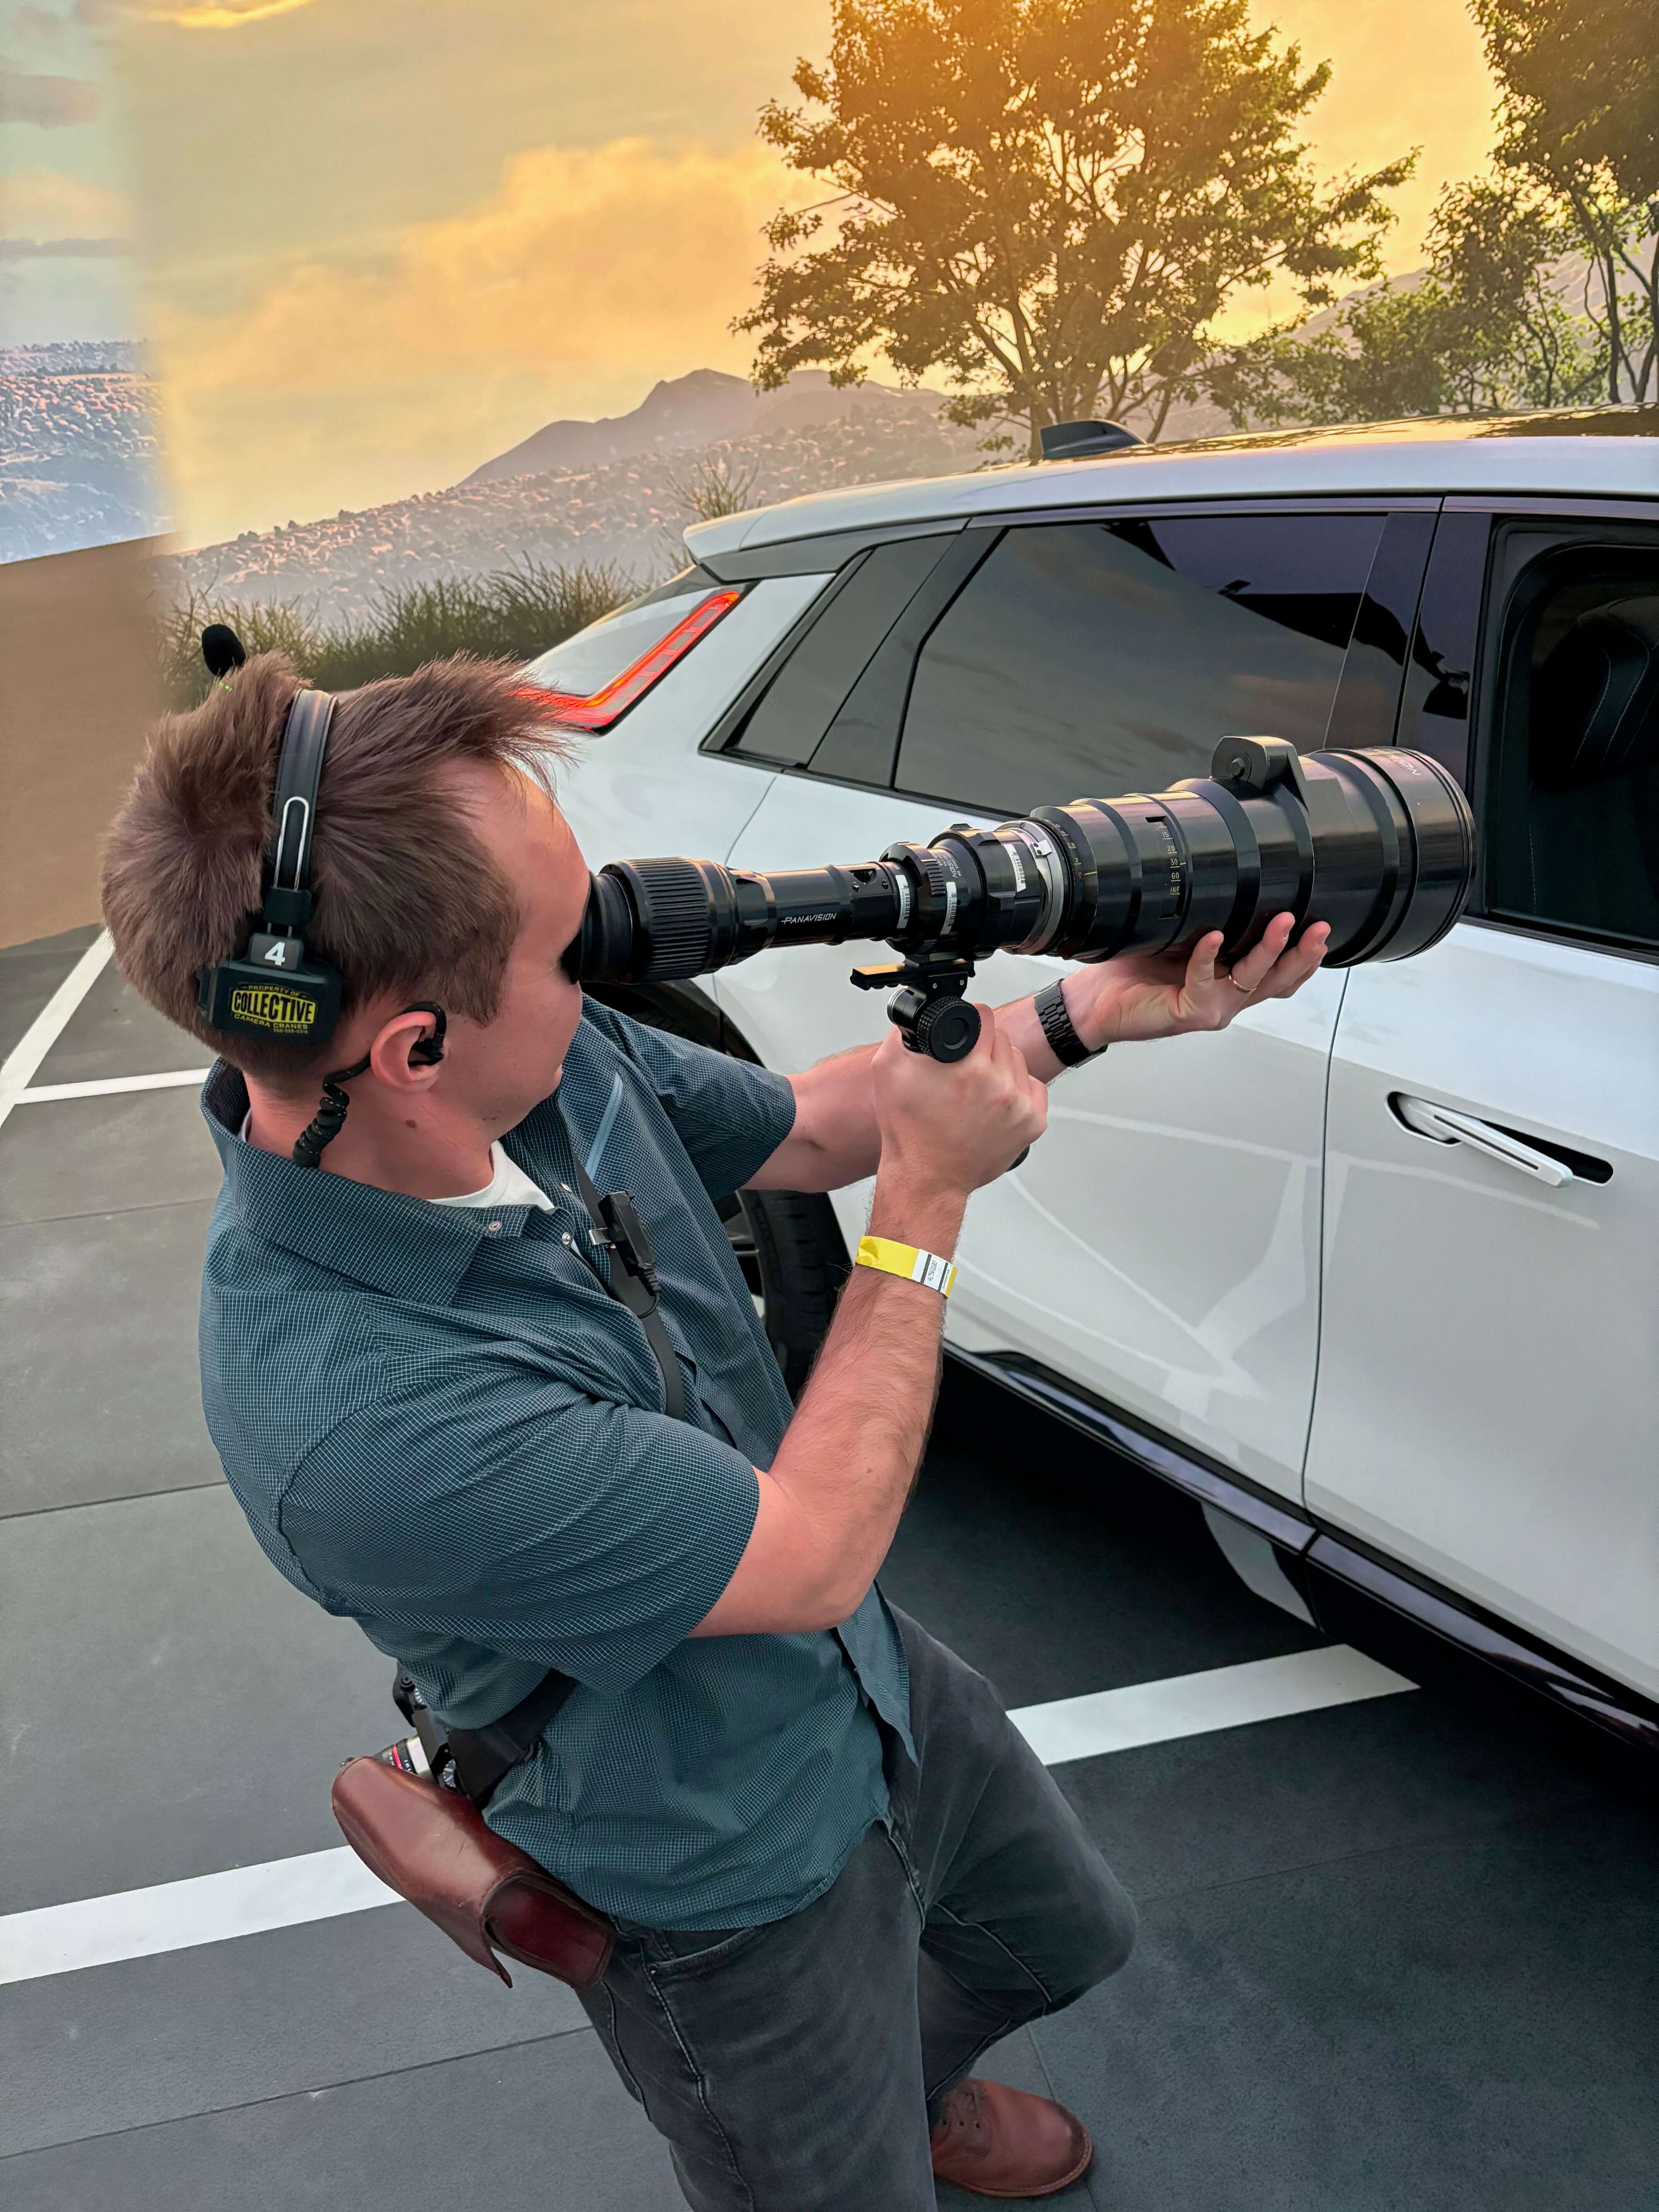
This shot used a similar setup from the Coastal Road, but with the added complexity of having the camera up close to the driver inside the car. Garrett Dorin, our crane op, orchestrated some very small yet difficult moves covering only a few feet. These quick and tiny moments are always difficult to capture with a bulky camera, and a lesson learned for me here was how vital a 2nd camera body would have been.
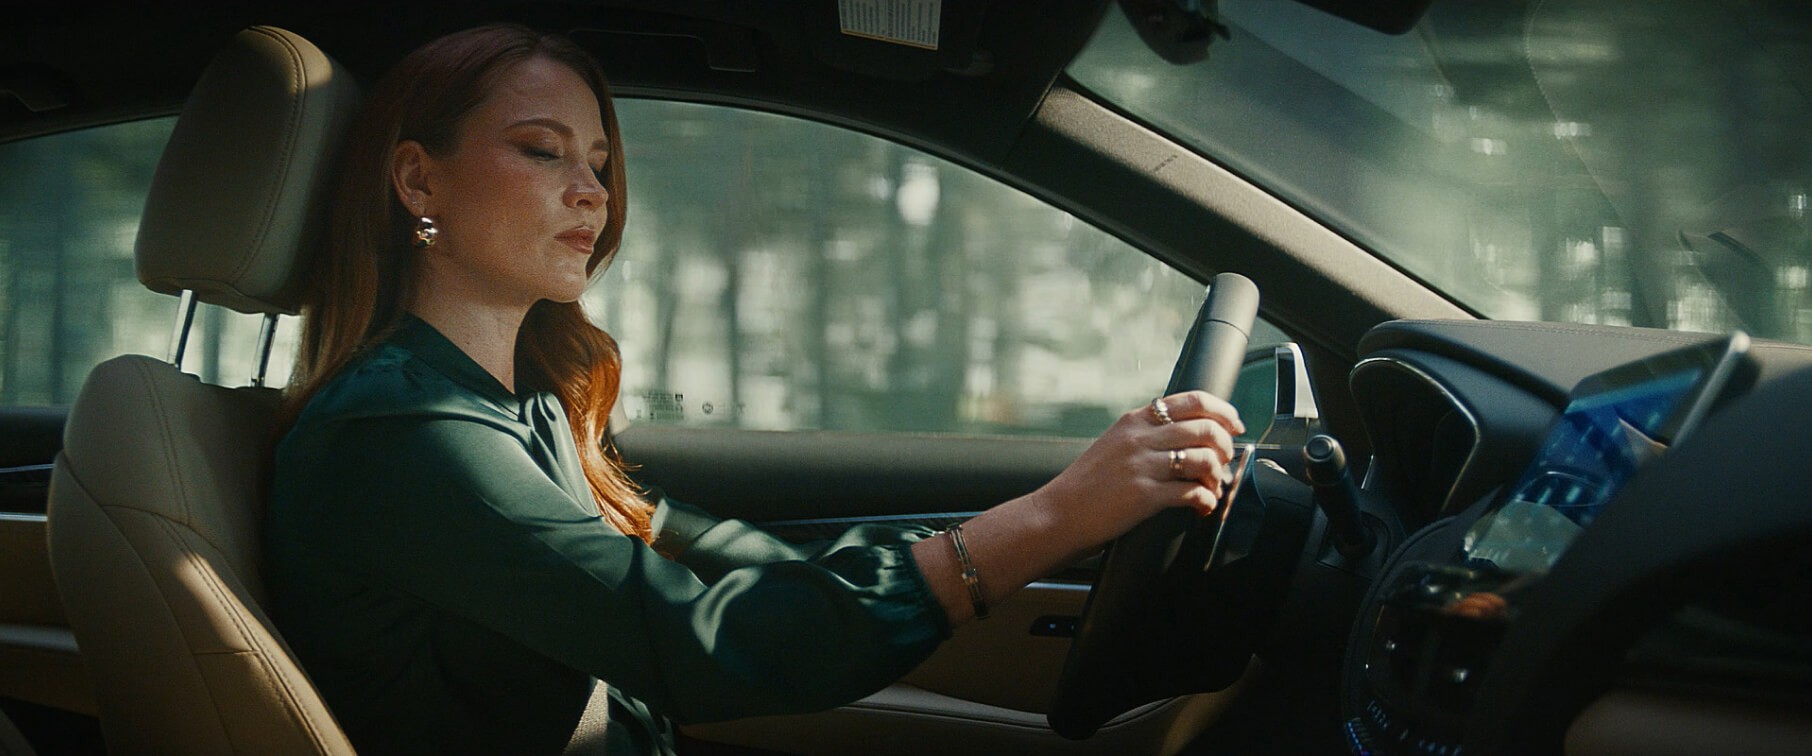
Day Int. - Forest Road - In Motion
Our final setup called for a bit more of a classic poor-man’s-process lighting gag: scattered forest sunlight during a driving moment. We elected to use the T12 bounced off a 4’ mirror to gain some fall-off (it’s a tight squeeze even in a medium/large LED volume), and Brendan’s team employed a branch-o-loris windmill. The effect is subtle in the shoot, but really helps the moment. Adding those subtleties for variations in lighting really helps sell effects like this.
Gear Used
the Most
Modulus-X™ Truss
J.L. Fisher Model 10
4x Diffusion
Specialty
gear
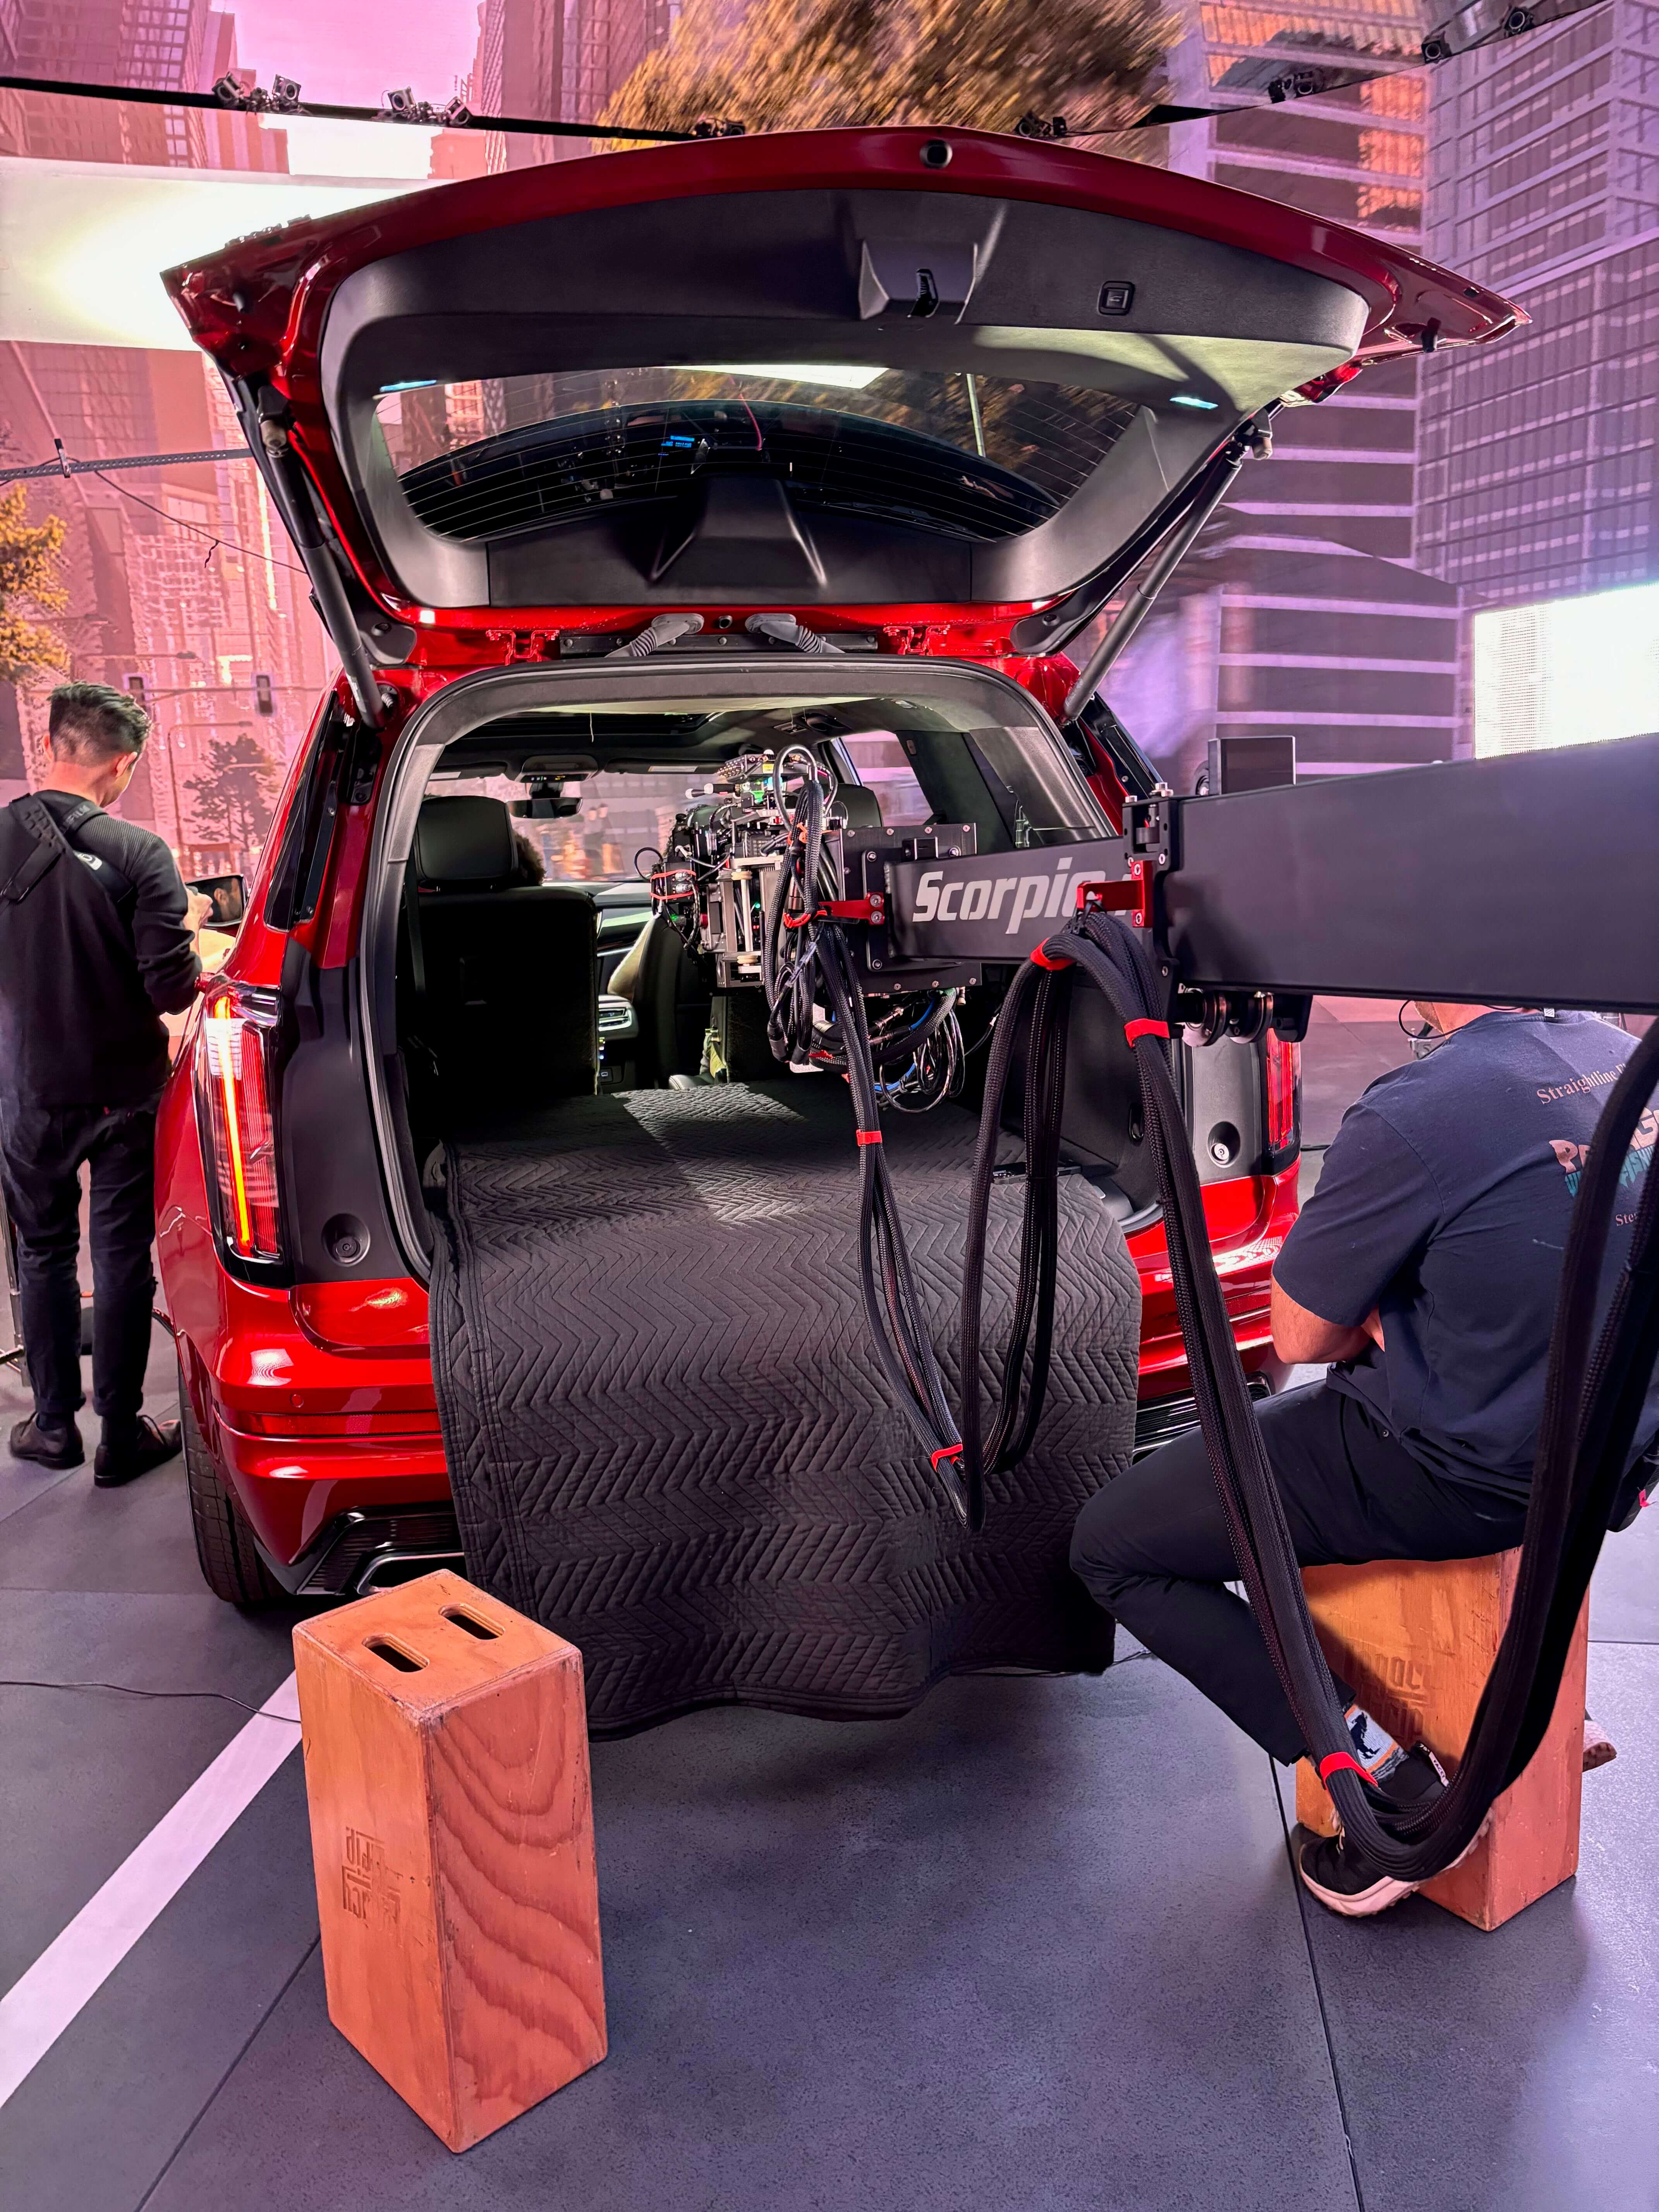
4’ Mini Original Camera Slider, Scorpio 17, Mini Libra Head

We pulled the doors on a lot of the cars for easier crane movement
Also pulled a few LED panels to rig up this T12
In a virtual reality environment we can put a big bounce / source anywhere on the wall
Our Modulus-X windshield push rig on the Fisher 10
Built With
Scorpio
Modulus-X™
Original Camera Slider
On set mvp
MVP on this job goes to our technocrane operator. Garrett executed precise moves flawlessly. We had tons of shots that required intricate moves that needed to hit specific marks and Garrett delivered flawlessly. He knows his gear, gets professional results, and makes the shoot go smoothly. Thanks, Garrett!


by:
Luc Delamare