gallery
gallery
Case Study
Tight Moves & Virtual Roads: A Cadillac Case Study
by:
Luc Delamare
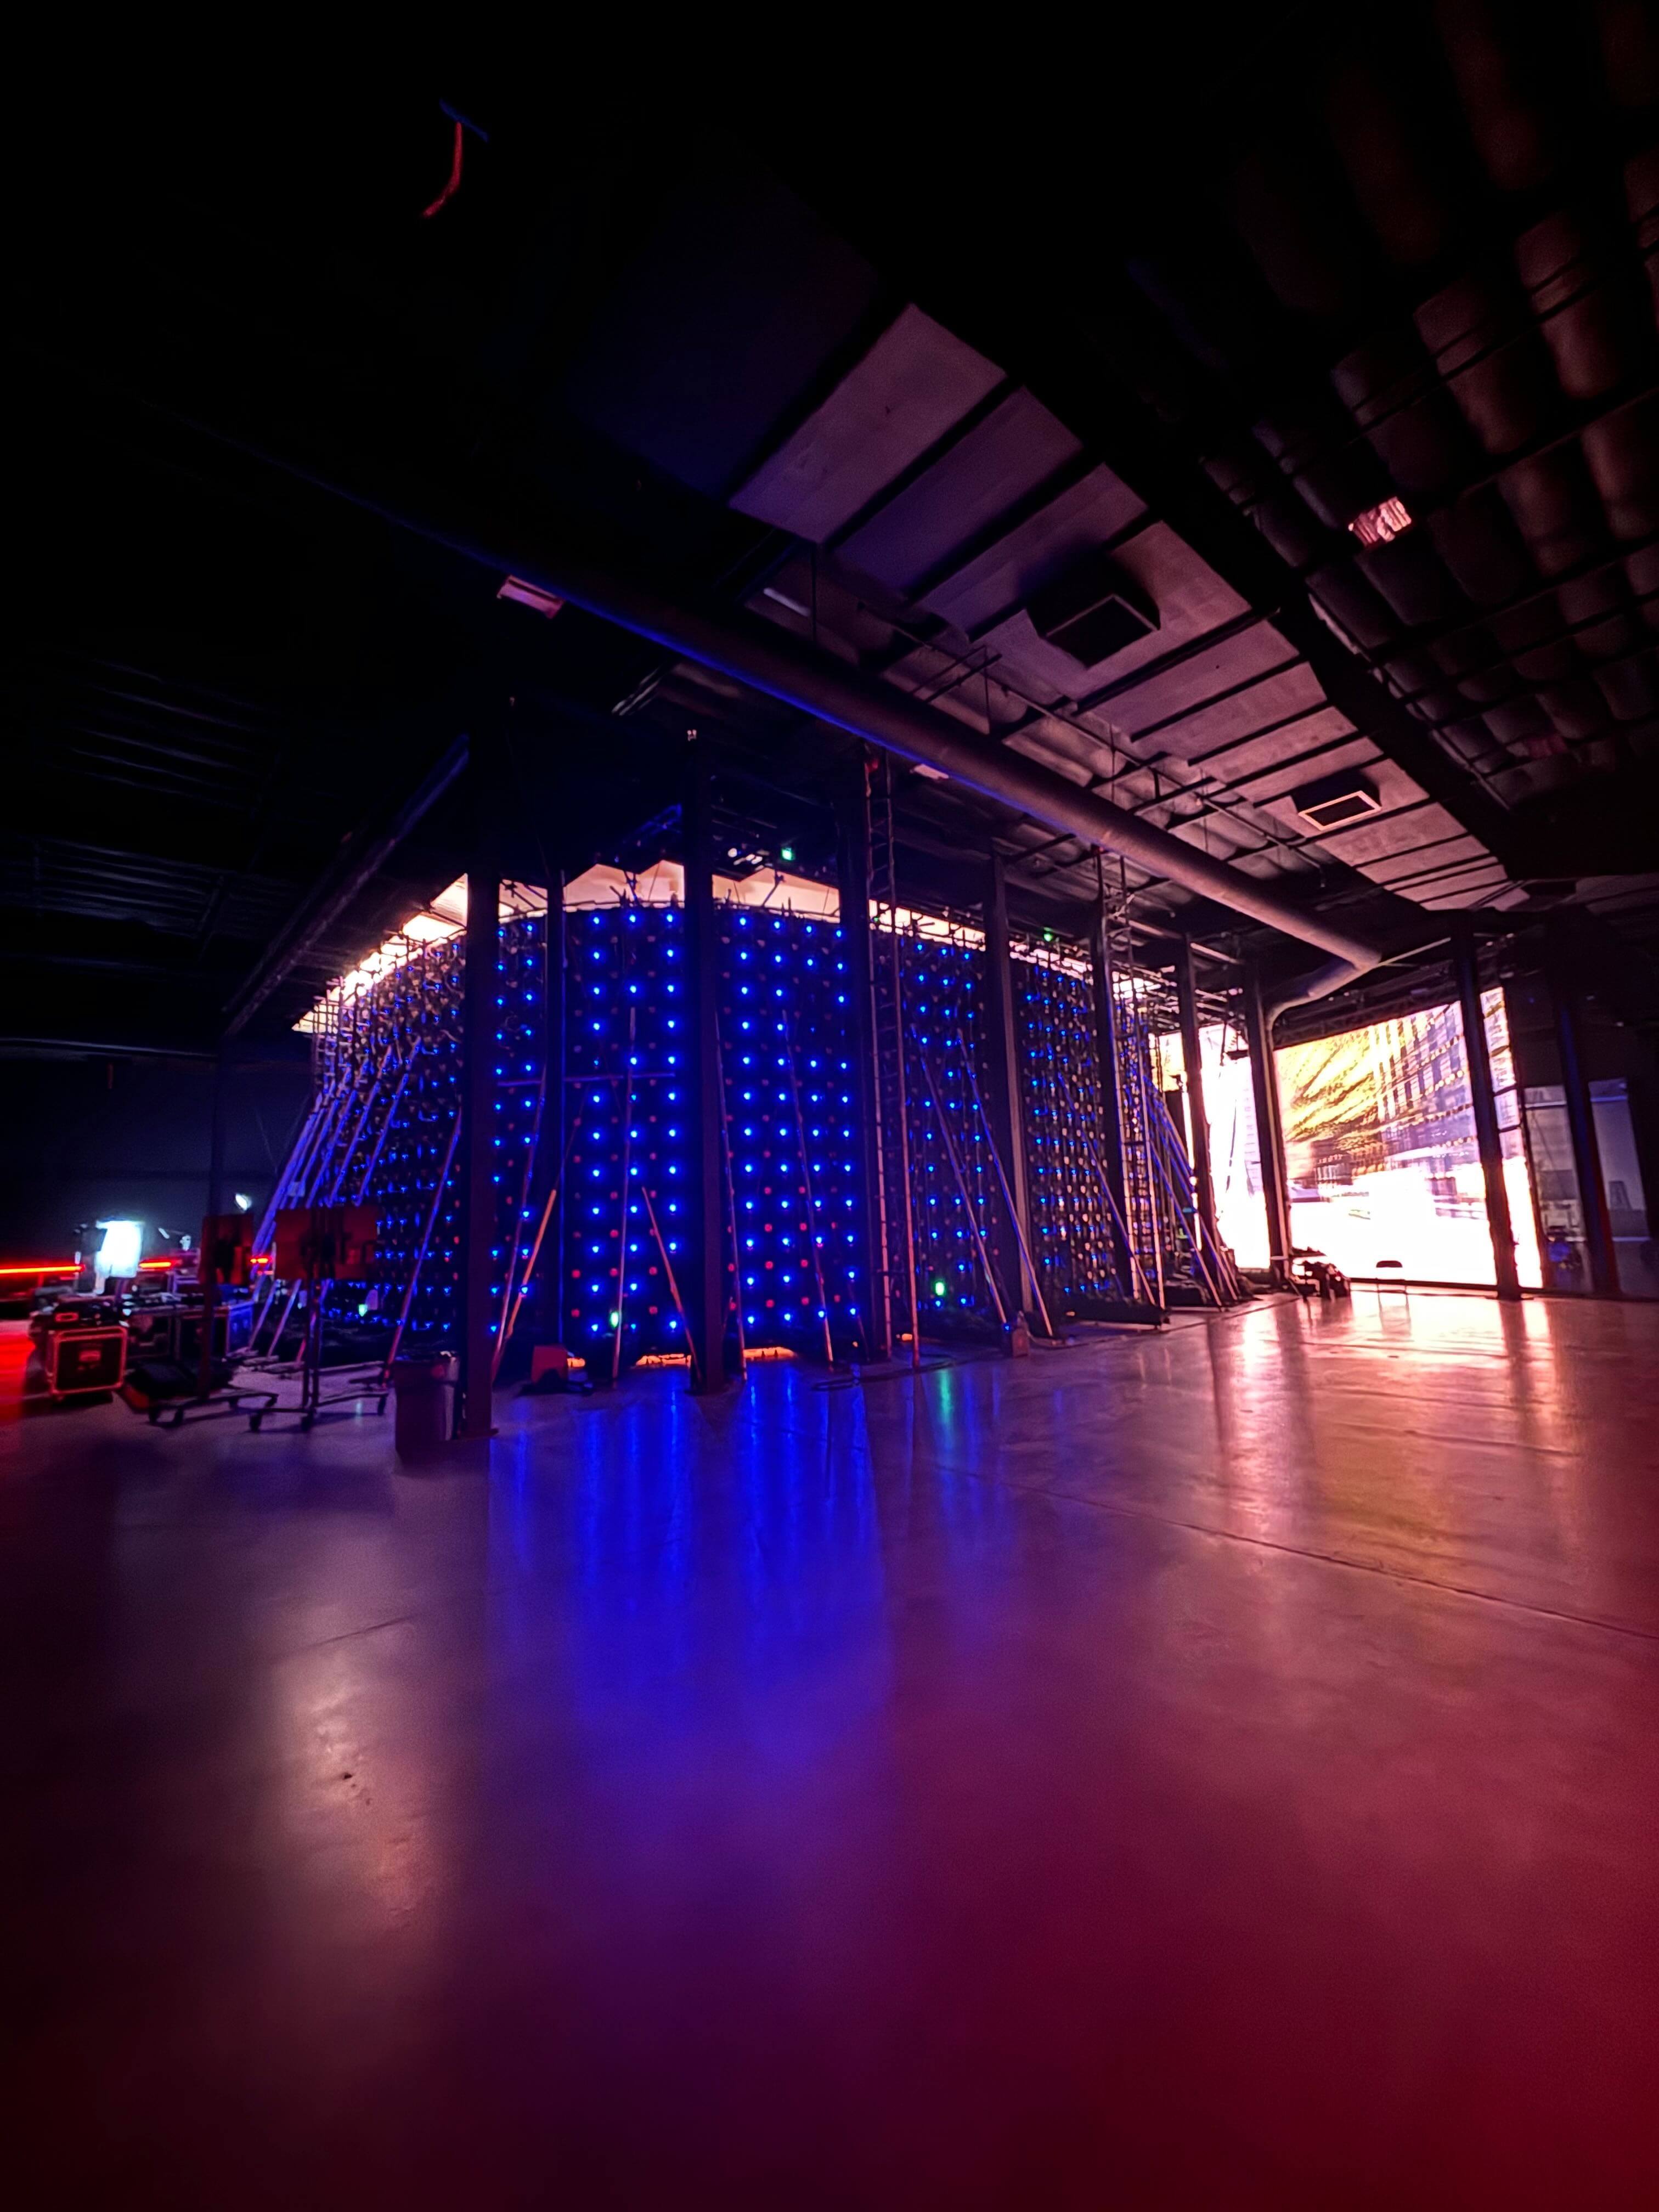
LED walls used to be this big scary new tech. In the early days things like hertz and frame rates would be either a mystery or a guessing game, lighting was a challenge, and camera tracking was a nightmare. The playbook had not yet been created. Just like with the advent of LED lighting, things take time to adjust and integrate into workflows. You realize what systems need improving, understand your base standards for execution, and figure out all the little quirks and tips that come with new technology.
We put the virtual production workflow to the test during our shoot for Cadillac.
With one combined prelight / tech rehearsal day, and two shoot days, this set of Cadillac TVCs featured 5 different vehicles in 6 different virtual environments. All of the vehicle interiors for the spots were captured with ICVFX (in camera vfx) on Nant Studio’s LED Volume 1 in El Segundo. With the help of some extensive prep & previz, Brendan, Vince, and I were able to move at record pace for a commercial with intricate technical requirements.
Read >
Case Study
Adjustability When Car Rigging
by:
Brendan Riel
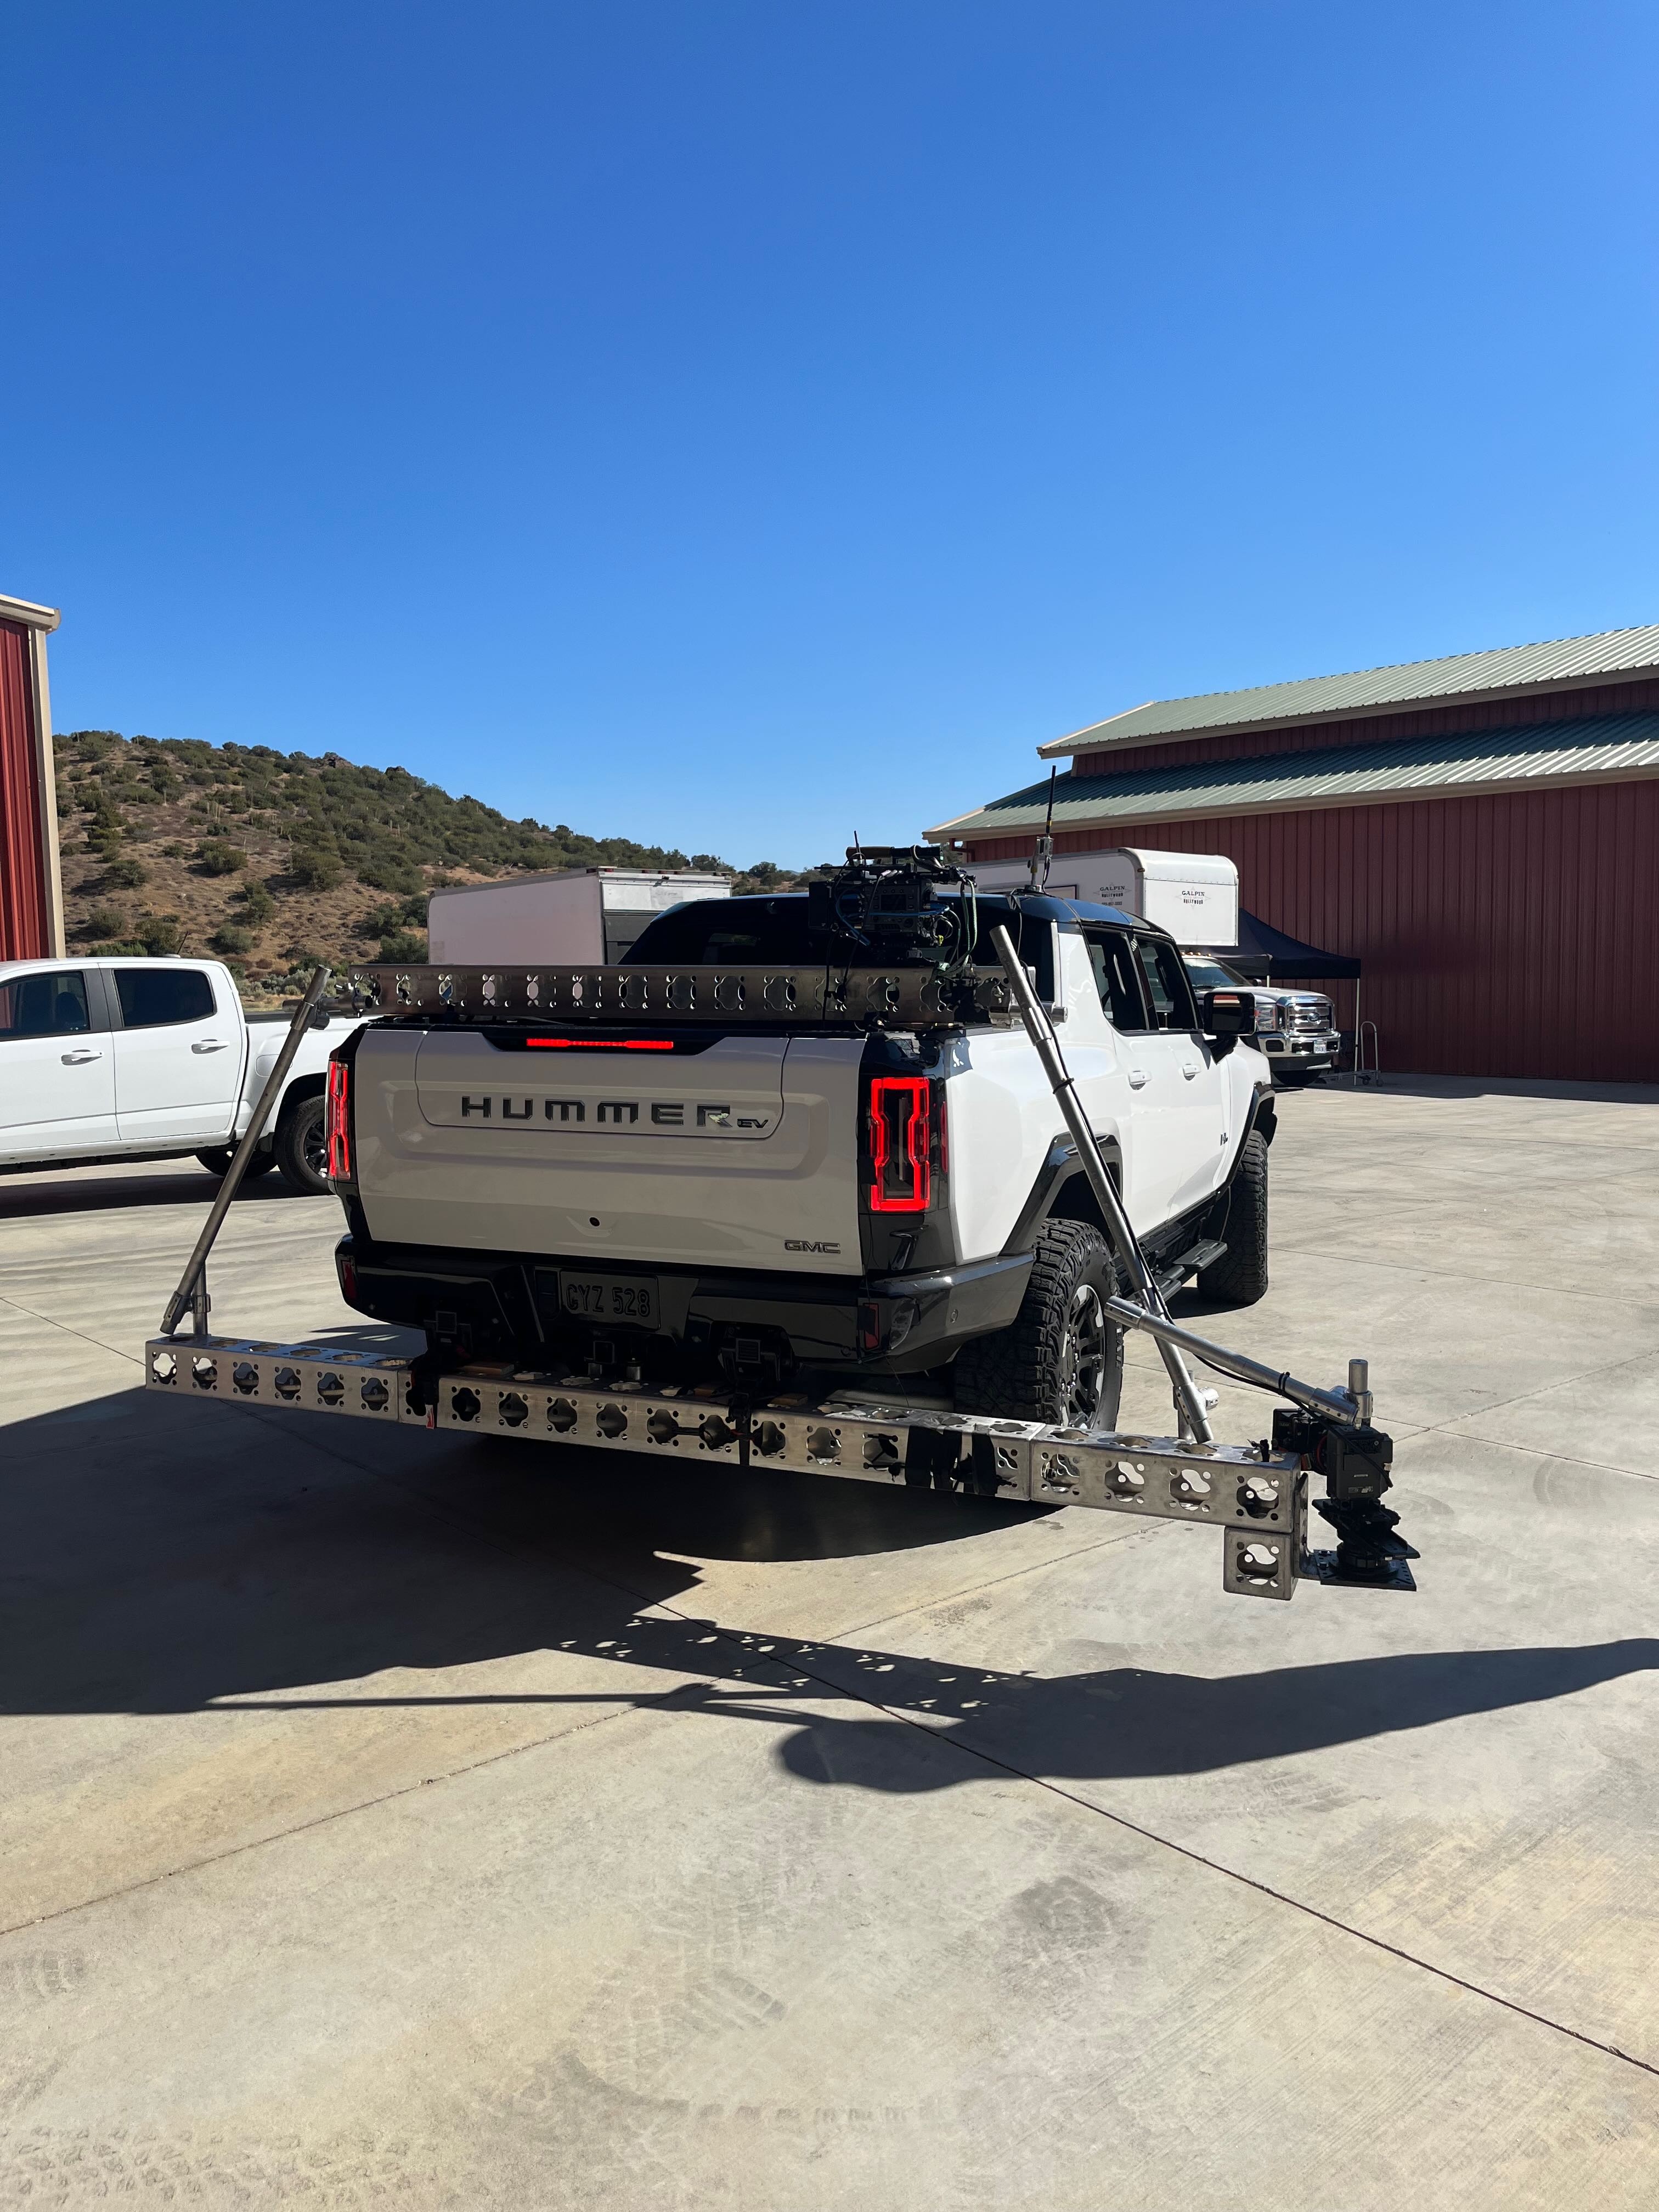
We had some location lighting, some drone work, some arm car work, and a ton of vehicle rigs for this Hummer EV commercial. I wasn’t complaining one bit.
The workload demanded that we have a decent crew size. Ran with K + 8 for the most part in order to make it all happen. We were rigging to what the audience would perceive as the same Hummer but we had 4 different identical vehicles to work with during our shoot. Production scheduled each car so that we’d always have on in our bay getting set up for the next rig. We pre-planned the majority of the rigs in pre pro and found a few camera positions on the day.
I was able to check out the vehicle before we started shooting. Went over to the dealer they shipped them all to and crawled underneath. What I saw seemed promising in some aspects. Like most electric vehicles, there was one big surface in the middle of the underside. But all around there appeared to be what looked like holes that would be great for body starters, ratchet hooks, and bolts. The wheels started turning. Additionally, I think only 2 of our Hummer EV’s featured tow hitches in the rear. Another mounting point that we would later utilize.
One thing that really worked in our favor for rigging to the underside was the fact that the vehicle could raise and lower its chassis. We had ample clearance underneath when raised, which was a key point for when I got to thinking about how we would be building out our rigging infrastructure.
The DP and I chatted about being able to move from rig to rig quickly. Additionally he wanted to be able to pop off a shot that was far off the vehicle, low to the ground, looking down the whole side of the vehicle. I decided to employ the use of Mod Truss as the base for the majority of these rigs because of its ease of use, its rigidity, and its size to strength ratio. I knew with the clearance we had underneath the vehicle we could shoot truss across the entire width and / or length if we needed to. This proved useful in a few of our rigs.
Read >

Case Study
Vertical Camera Rig & Tents
by:
Brendan Riel
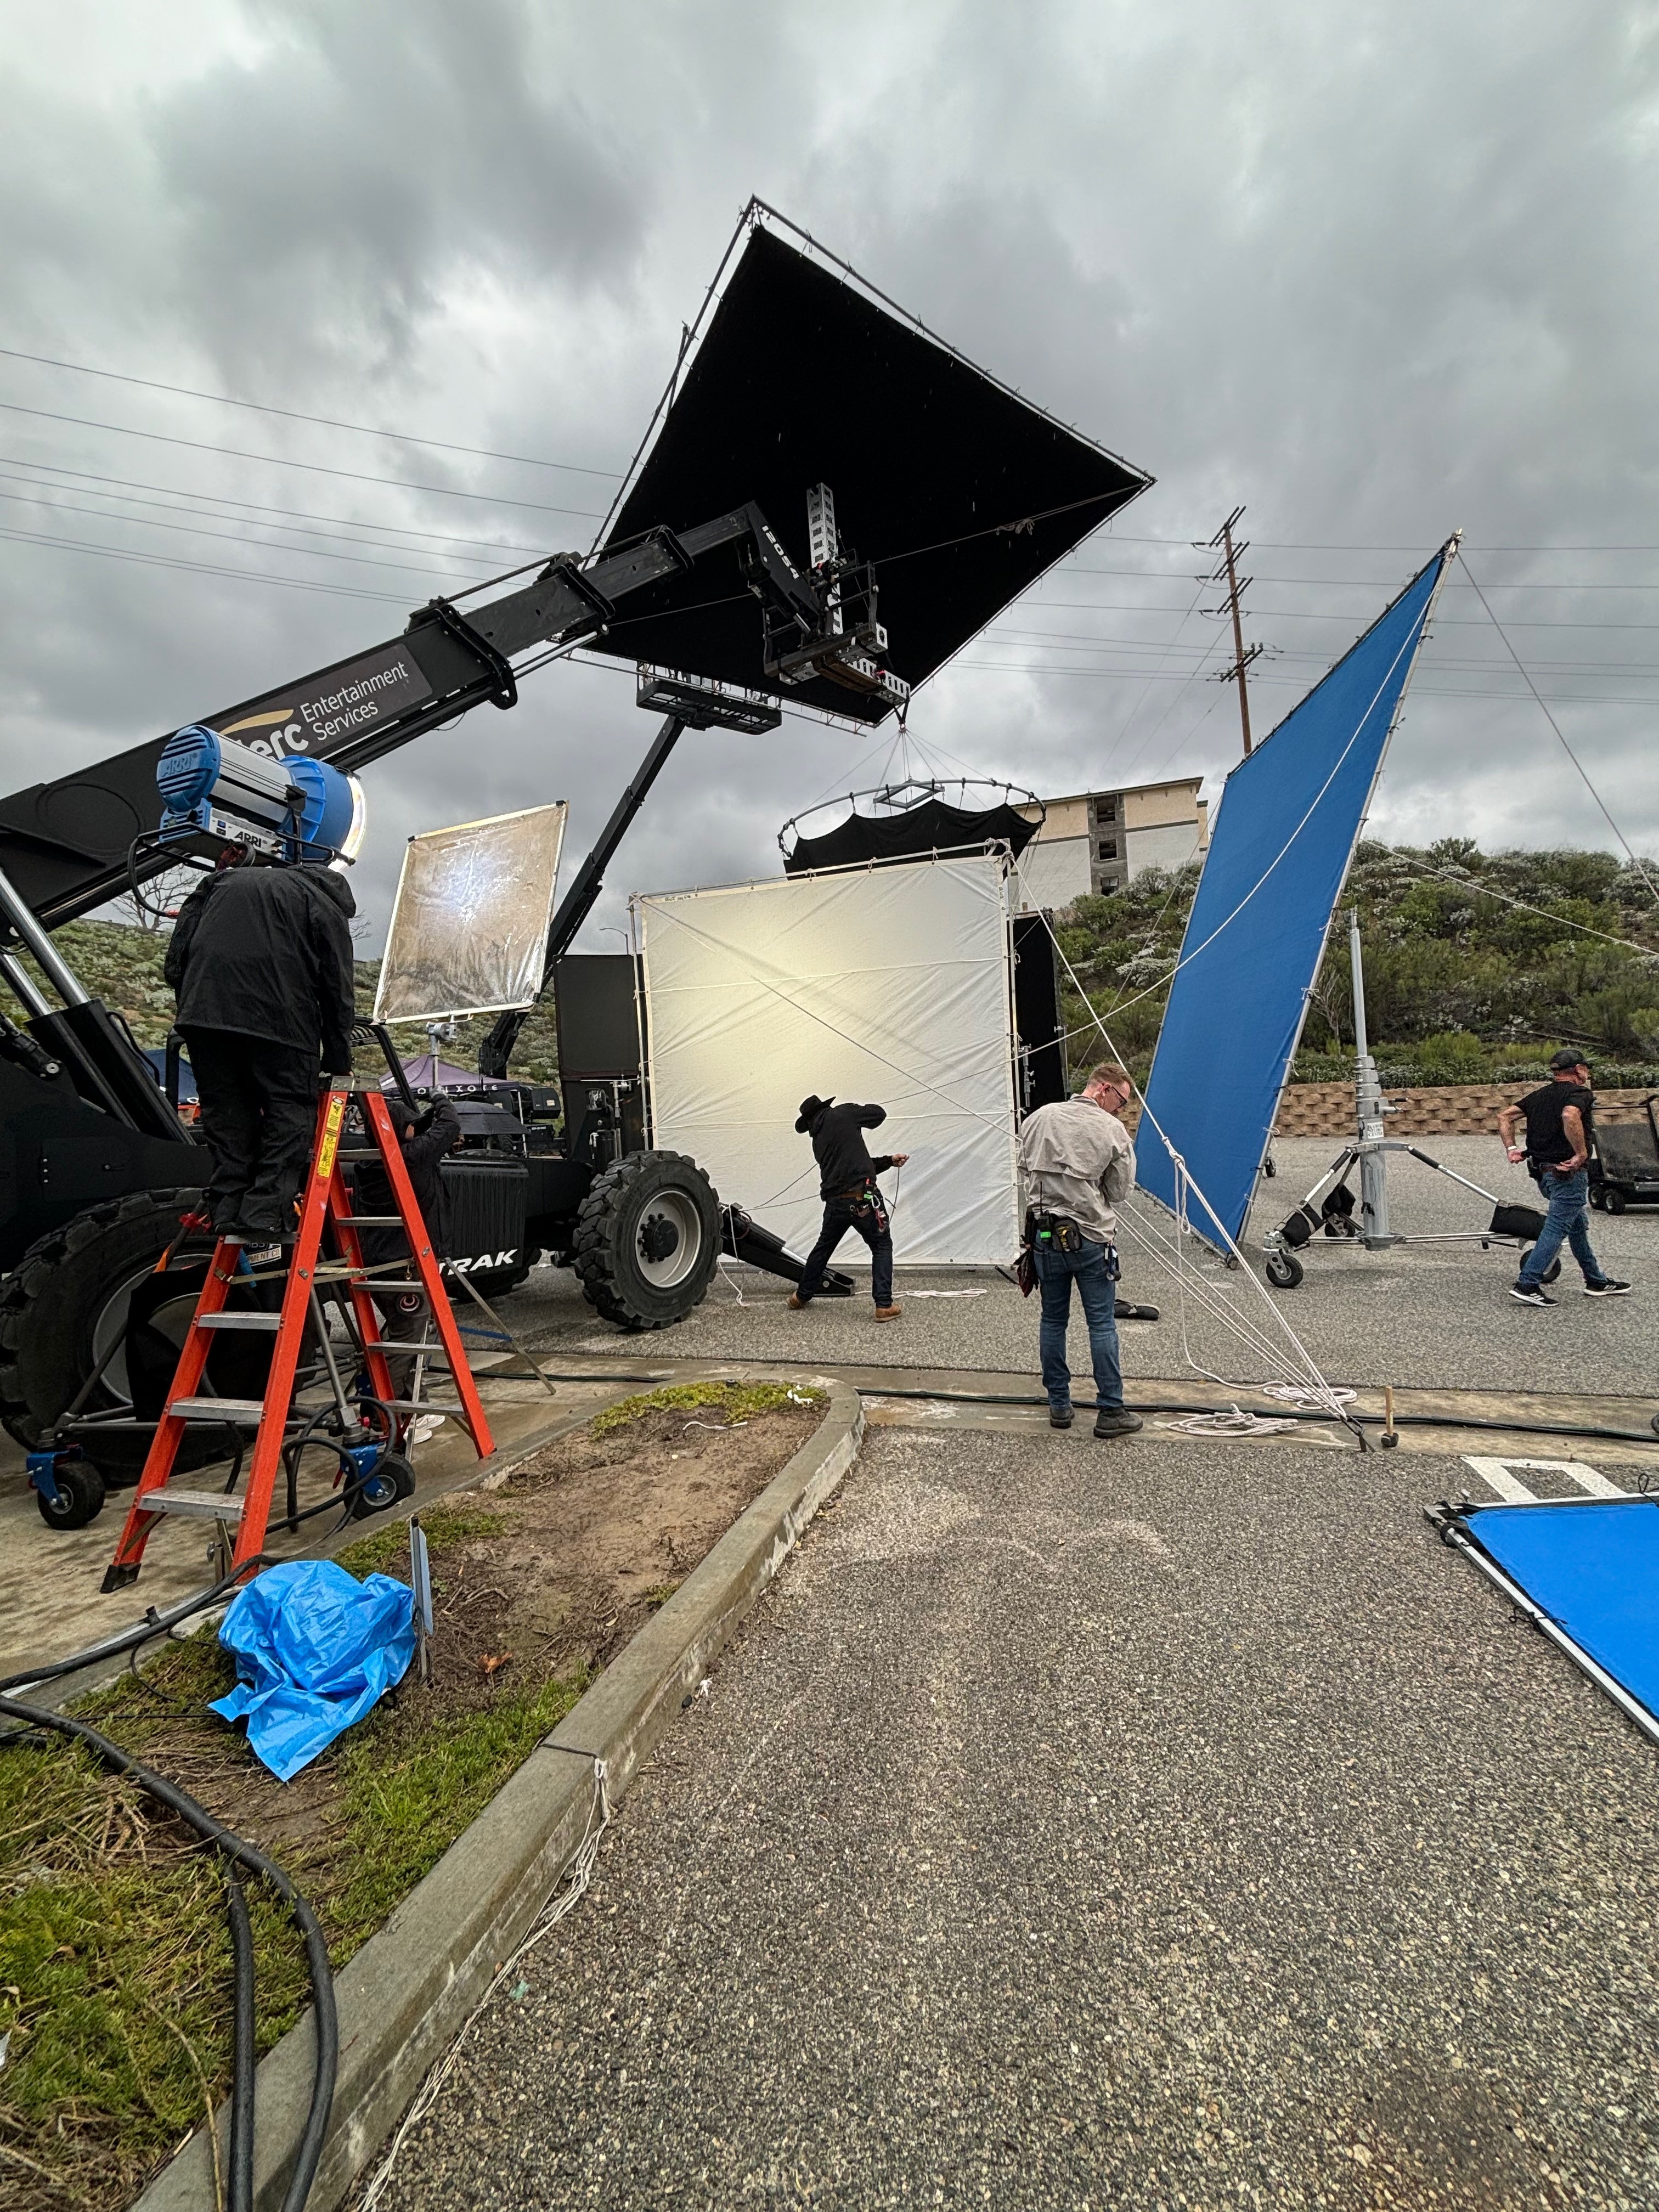
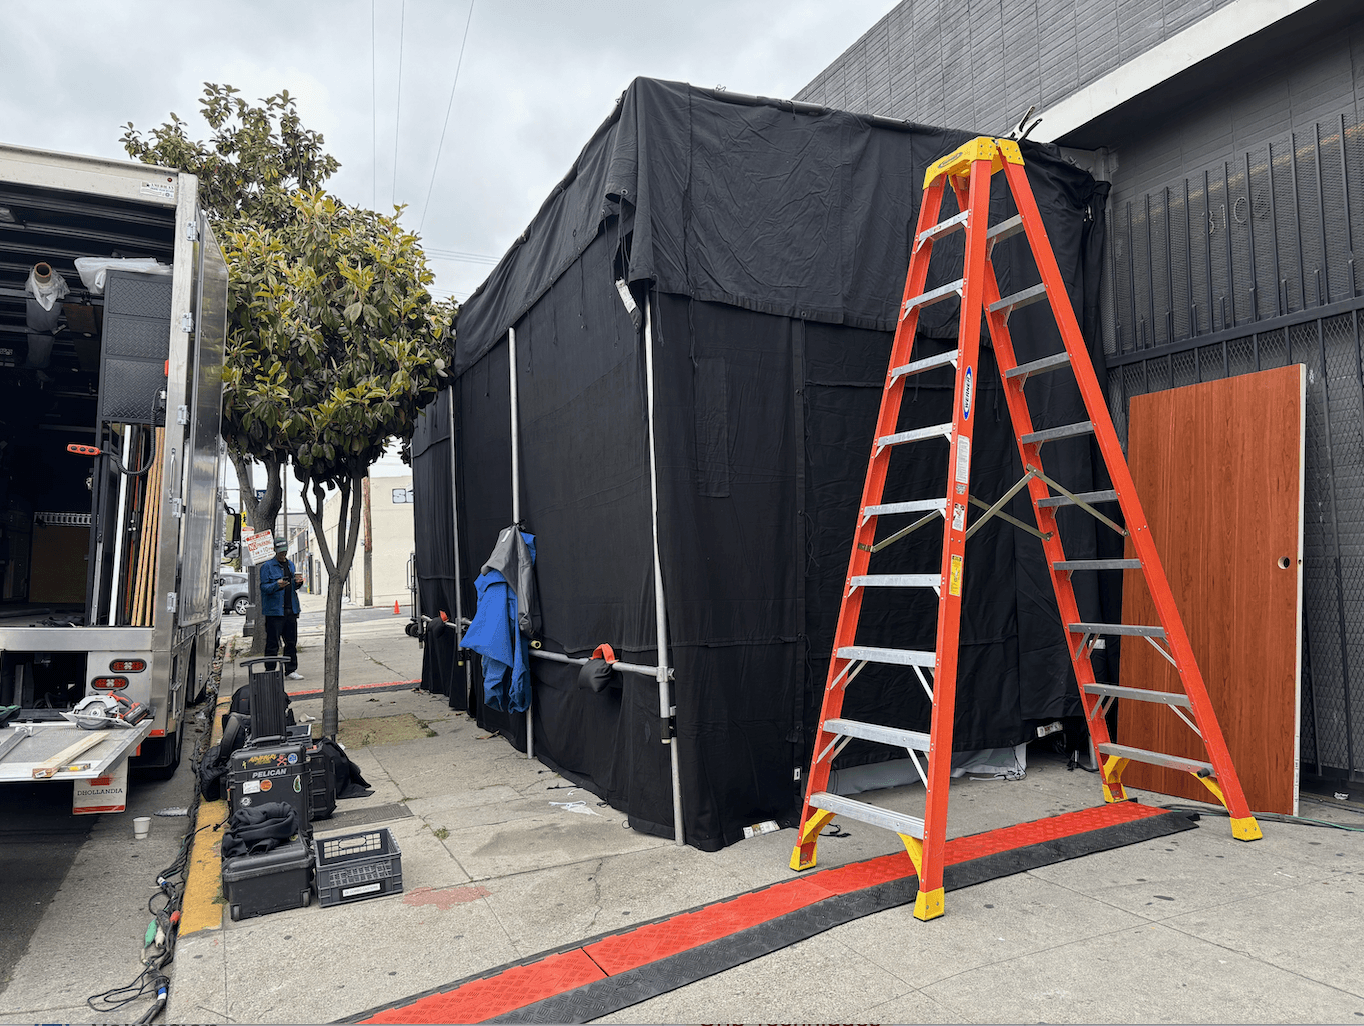
This 3 day job was all shot at a residential house. 1 day to pre rig and 2 days to shoot. One of our main objectives on the pre rig day was to tent both the front and back exteriors. We weren’t doing day for night - we were setting up for a mid-shot shift in lighting from daylight to RGB. Luckily, all of our work inside the house was on the first floor. We blacked out a few windows that were off camera but tented a large majority of all windows and doors in both the front and back of the house.
The back of the house owed 2 different tents. We built the structures out of 1-1/4” speedrail, hollaenders and over unders. Dimensions for our largest was 8’ deep x 10’ high x 40’ wide. Smallest was 8’ deep x 10’ high x 8’ wide. I like using over unders near the bottom of the verticals to adjust the heights with shorter pipe. Works well when you need the top height to be at 13’8” and you left your 13’8” speedrail back at the yard…
We threw a couple of water solids over the structures and made sure they overlapped. The house windows and doors were frosted so we weren’t worried about seeing the pipe in the interior of the tent. The solids hung off the pipe where it pressed up against the house which ensured the property didn’t take any damage. We used water solids because the tents were going to be up for a few days. Any sort of dew our moisture overnight would stain a regular solid. We sandbagged some bottom rails and tied the tents off. A large area of floor to ceiling doors got a goal posted solid on the day since it was off camera.
The front of the house tent was a more makeshift one we constructed on the day. We wanted to be able to read set lighting’s RBG colors on the inside of the house in broad daylight. The shot happened in 2 parts, both on techno, and they comped them in vfx. The first one we did was with the tent set up to darken exterior ambiance and read the inside color. For the second shot we pulled the tent / solids and shot the daylight exterior house plate. Same crane move for both, same speed.
We went a little down and dirty for this one and just set up a few goal posts and stretched solids across and down them. No time or need to build out a full pipe skeleton. We were just controlling ambiance - it didn’t need to be bullet proof.
Read >
Case Study
Frames, Ladder Pods, and Westerns On This Commercial
by:
Brendan Riel
Lots of fun on this 3 day commercial shoot with a couple of different locations for a well known popcorn brand. Our first location was at Air Hollywood. We shot both inside in an airplane buck and outside in the parking lot. For our first setup outside in the parking lot we built a Modulus-X 9” truss rig and secured it onto a 12054 telehandler to hang a hot air balloon basket. I wanted to get the pick point out a little further away from the carriage which is why we didn’t just pick it off the bottom hook of the carriage. We used Modulus-X 9” because I co-own Division and we have it readily available. When building a rig that sticks out further than the telehandler it’s generally good practice to integrate a vertical member into your rig. This distributes the force in the components (in this case a singular piece of truss) sticking out. We secured the vertical portion of the rig to the carriage as well with both a basketed 2” ratchet and SK clamps. The load rating of 9” ModX is insane, so it was never really a worry, but it’s good practice. A 6’ stick of the 9” boasts a roughly 15,000# uniform center load WLL just to give you an idea.
The hot air balloon company took care of attachment for the balloon to the telehandler - they have a special rig they use all the time with film productions.
It was overcast and drizzly but we set up so that if the sun did peak out it would be backlit. Popped a 20x20 chroma blue behind the basket for vfx as they were supposed to be way up in the sky. Whenever I’m worked with a 20x20 frame that doesn’t work tabled I like to put it on either black bird cranks or long johns. It makes it way more manageable to work with. We shaped in some negative fill with a 12x20 water solid and angled a 20x20 water solid swatter overhead. Gaffer Mathias Peralta key’d talent with an M90 thrown through some color and diffused through a 12x grid. He backlit with an 18k on a 60’ articulating boom and blasted through some color on that too.
After we got rained out we finished off a bit of the balloon basket inside still against blue screen and transitioned over to the airplane. We lit with more warm sun to match the hot air balloon look and injected some day blue ambience into the cockpit to simulate the clear sky.
Read >

Case Study
From Vectorworks to Stage Layout
by:
Brendan Riel
I used to be a pen and paper guy but have recently decided to keep up with the times. Pen and paper is great - but it makes changing things a little harder. You have to re-draw your layout every time the gaffer wants to increase the size of your softbox or change the orientation of your lighting. When your softbox size changes now you have to re-draw your truss skeleton again to make sure you’re quoting out and ordering the correct components. I would end up with pages of variations as we progressed through the pre production process. In a way it acted as good documentation and was still there if we wanted to go back to a previous setup. But it wasn’t the most efficient.
I find this whole planning and designing process to be streamlined in 3D. Shifting around components and saving versions is a lot faster than drawing out iterations on paper. Plus you get the bonus of being able to visualize things in 3D space. Your run of blue screen lights on truss may seem good 5’ away from the blue on paper but in 3D you might see that an 8’ distance might work better.
I design layouts in Vectorworks Spotlight. It’s the industry standard for plotting truss and motors and laying out your builds. You can do a multitude of things in Vectorworks - model your stage and overhead rigging points, plot truss and motors, attach lighting instruments to truss, design seating and stage layout, design softboxes and rigs attached to lifts, and much more. This only scratches the surface of what is possible in Vectorworks. There are so many ways to work with data within the program. With lighting you can assign fixture addresses and play with DMX. With truss you can see hanging structure load totals and count up individual pieces for proper pull lists.
All this Vectorworks capability comes with one small setback - the leaning curve is steep.
Let's break down how I integrated Vectorworks into my pre production workflow for a project I worked on.
Read >
Case Study
Tents & Camera Rigs
by:
Brendan Riel
This was a 2 day spot for a live event company. We scouted a few days before the shoot and felt pretty good coming into it. We shot 3 different spots in 2 days.
Day 1 we shot in a restaurant. Our main artist talent for the day was only going to be with us for 45 minutes max when she showed up. We had 2 hours to set up and then we shot her out. We shot with our other talent the rest of the day and wrapped after 10 hours. Since we were shooting in an active restaurant we kept all our lighting on the ground. For our key light we employed the use of a Matthew max menace arm. We went for a stage lighting look and rigged some movers to 2x 10' sticks of black 12" box truss on base plates. Electricians brought in 2 more par trees with some additional small moving lights. All 4 of those blended into the background nicely. The rest of the day involved moving around the max menace arm and employing some ground units with 4x diffusion.
Read >
Case Study
Tight Moves & Virtual Roads: A Cadillac Case Study
by:
Luc Delamare
LED walls used to be this big scary new tech. In the early days things like hertz and frame rates would be either a mystery or a guessing game, lighting was a challenge, and camera tracking was a nightmare. The playbook had not yet been created. Just like with the advent of LED lighting, things take time to adjust and integrate into workflows. You realize what systems need improving, understand your base standards for execution, and figure out all the little quirks and tips that come with new technology.
We put the virtual production workflow to the test during our shoot for Cadillac.
With one combined prelight / tech rehearsal day, and two shoot days, this set of Cadillac TVCs featured 5 different vehicles in 6 different virtual environments. All of the vehicle interiors for the spots were captured with ICVFX (in camera vfx) on Nant Studio’s LED Volume 1 in El Segundo. With the help of some extensive prep & previz, Brendan, Vince, and I were able to move at record pace for a commercial with intricate technical requirements.
Read >
Case Study
Adjustability When Car Rigging
by:
Brendan Riel
We had some location lighting, some drone work, some arm car work, and a ton of vehicle rigs for this Hummer EV commercial. I wasn’t complaining one bit.
The workload demanded that we have a decent crew size. Ran with K + 8 for the most part in order to make it all happen. We were rigging to what the audience would perceive as the same Hummer but we had 4 different identical vehicles to work with during our shoot. Production scheduled each car so that we’d always have on in our bay getting set up for the next rig. We pre-planned the majority of the rigs in pre pro and found a few camera positions on the day.
I was able to check out the vehicle before we started shooting. Went over to the dealer they shipped them all to and crawled underneath. What I saw seemed promising in some aspects. Like most electric vehicles, there was one big surface in the middle of the underside. But all around there appeared to be what looked like holes that would be great for body starters, ratchet hooks, and bolts. The wheels started turning. Additionally, I think only 2 of our Hummer EV’s featured tow hitches in the rear. Another mounting point that we would later utilize.
One thing that really worked in our favor for rigging to the underside was the fact that the vehicle could raise and lower its chassis. We had ample clearance underneath when raised, which was a key point for when I got to thinking about how we would be building out our rigging infrastructure.
The DP and I chatted about being able to move from rig to rig quickly. Additionally he wanted to be able to pop off a shot that was far off the vehicle, low to the ground, looking down the whole side of the vehicle. I decided to employ the use of Mod Truss as the base for the majority of these rigs because of its ease of use, its rigidity, and its size to strength ratio. I knew with the clearance we had underneath the vehicle we could shoot truss across the entire width and / or length if we needed to. This proved useful in a few of our rigs.
Read >
Case Study
Vertical Camera Rig & Tents
by:
Brendan Riel
This 3 day job was all shot at a residential house. 1 day to pre rig and 2 days to shoot. One of our main objectives on the pre rig day was to tent both the front and back exteriors. We weren’t doing day for night - we were setting up for a mid-shot shift in lighting from daylight to RGB. Luckily, all of our work inside the house was on the first floor. We blacked out a few windows that were off camera but tented a large majority of all windows and doors in both the front and back of the house.
The back of the house owed 2 different tents. We built the structures out of 1-1/4” speedrail, hollaenders and over unders. Dimensions for our largest was 8’ deep x 10’ high x 40’ wide. Smallest was 8’ deep x 10’ high x 8’ wide. I like using over unders near the bottom of the verticals to adjust the heights with shorter pipe. Works well when you need the top height to be at 13’8” and you left your 13’8” speedrail back at the yard…
We threw a couple of water solids over the structures and made sure they overlapped. The house windows and doors were frosted so we weren’t worried about seeing the pipe in the interior of the tent. The solids hung off the pipe where it pressed up against the house which ensured the property didn’t take any damage. We used water solids because the tents were going to be up for a few days. Any sort of dew our moisture overnight would stain a regular solid. We sandbagged some bottom rails and tied the tents off. A large area of floor to ceiling doors got a goal posted solid on the day since it was off camera.
The front of the house tent was a more makeshift one we constructed on the day. We wanted to be able to read set lighting’s RBG colors on the inside of the house in broad daylight. The shot happened in 2 parts, both on techno, and they comped them in vfx. The first one we did was with the tent set up to darken exterior ambiance and read the inside color. For the second shot we pulled the tent / solids and shot the daylight exterior house plate. Same crane move for both, same speed.
We went a little down and dirty for this one and just set up a few goal posts and stretched solids across and down them. No time or need to build out a full pipe skeleton. We were just controlling ambiance - it didn’t need to be bullet proof.
Read >
Case Study
Frames, Ladder Pods, and Westerns On This Commercial
by:
Brendan Riel
Lots of fun on this 3 day commercial shoot with a couple of different locations for a well known popcorn brand. Our first location was at Air Hollywood. We shot both inside in an airplane buck and outside in the parking lot. For our first setup outside in the parking lot we built a Modulus-X 9” truss rig and secured it onto a 12054 telehandler to hang a hot air balloon basket. I wanted to get the pick point out a little further away from the carriage which is why we didn’t just pick it off the bottom hook of the carriage. We used Modulus-X 9” because I co-own Division and we have it readily available. When building a rig that sticks out further than the telehandler it’s generally good practice to integrate a vertical member into your rig. This distributes the force in the components (in this case a singular piece of truss) sticking out. We secured the vertical portion of the rig to the carriage as well with both a basketed 2” ratchet and SK clamps. The load rating of 9” ModX is insane, so it was never really a worry, but it’s good practice. A 6’ stick of the 9” boasts a roughly 15,000# uniform center load WLL just to give you an idea.
The hot air balloon company took care of attachment for the balloon to the telehandler - they have a special rig they use all the time with film productions.
It was overcast and drizzly but we set up so that if the sun did peak out it would be backlit. Popped a 20x20 chroma blue behind the basket for vfx as they were supposed to be way up in the sky. Whenever I’m worked with a 20x20 frame that doesn’t work tabled I like to put it on either black bird cranks or long johns. It makes it way more manageable to work with. We shaped in some negative fill with a 12x20 water solid and angled a 20x20 water solid swatter overhead. Gaffer Mathias Peralta key’d talent with an M90 thrown through some color and diffused through a 12x grid. He backlit with an 18k on a 60’ articulating boom and blasted through some color on that too.
After we got rained out we finished off a bit of the balloon basket inside still against blue screen and transitioned over to the airplane. We lit with more warm sun to match the hot air balloon look and injected some day blue ambience into the cockpit to simulate the clear sky.
Read >
Case Study
From Vectorworks to Stage Layout
by:
Brendan Riel
I used to be a pen and paper guy but have recently decided to keep up with the times. Pen and paper is great - but it makes changing things a little harder. You have to re-draw your layout every time the gaffer wants to increase the size of your softbox or change the orientation of your lighting. When your softbox size changes now you have to re-draw your truss skeleton again to make sure you’re quoting out and ordering the correct components. I would end up with pages of variations as we progressed through the pre production process. In a way it acted as good documentation and was still there if we wanted to go back to a previous setup. But it wasn’t the most efficient.
I find this whole planning and designing process to be streamlined in 3D. Shifting around components and saving versions is a lot faster than drawing out iterations on paper. Plus you get the bonus of being able to visualize things in 3D space. Your run of blue screen lights on truss may seem good 5’ away from the blue on paper but in 3D you might see that an 8’ distance might work better.
I design layouts in Vectorworks Spotlight. It’s the industry standard for plotting truss and motors and laying out your builds. You can do a multitude of things in Vectorworks - model your stage and overhead rigging points, plot truss and motors, attach lighting instruments to truss, design seating and stage layout, design softboxes and rigs attached to lifts, and much more. This only scratches the surface of what is possible in Vectorworks. There are so many ways to work with data within the program. With lighting you can assign fixture addresses and play with DMX. With truss you can see hanging structure load totals and count up individual pieces for proper pull lists.
All this Vectorworks capability comes with one small setback - the leaning curve is steep.
Let's break down how I integrated Vectorworks into my pre production workflow for a project I worked on.
Read >
Case Study
Tents & Camera Rigs
by:
Brendan Riel
This was a 2 day spot for a live event company. We scouted a few days before the shoot and felt pretty good coming into it. We shot 3 different spots in 2 days.
Day 1 we shot in a restaurant. Our main artist talent for the day was only going to be with us for 45 minutes max when she showed up. We had 2 hours to set up and then we shot her out. We shot with our other talent the rest of the day and wrapped after 10 hours. Since we were shooting in an active restaurant we kept all our lighting on the ground. For our key light we employed the use of a Matthew max menace arm. We went for a stage lighting look and rigged some movers to 2x 10' sticks of black 12" box truss on base plates. Electricians brought in 2 more par trees with some additional small moving lights. All 4 of those blended into the background nicely. The rest of the day involved moving around the max menace arm and employing some ground units with 4x diffusion.
Read >

By subscribing you agree to with our privacy policy and provide consent to receive updates from our company.
Legacy Grip 2025 All Rights Reserved
By subscribing you agree to with our privacy policy and provide consent to receive updates from our company.
Legacy Grip 2025 All Rights Reserved
By subscribing you agree to with our privacy policy and provide consent to receive updates from our company.
Legacy Grip 2025 All Rights Reserved
By subscribing you agree to with our privacy policy and provide consent to receive updates from our company.
Legacy Grip 2025 All Rights Reserved